Policies Page
The Policies Page provides an overview of the policies added to the Policies box and their deployment history. It also lets you add new polices and configure them.
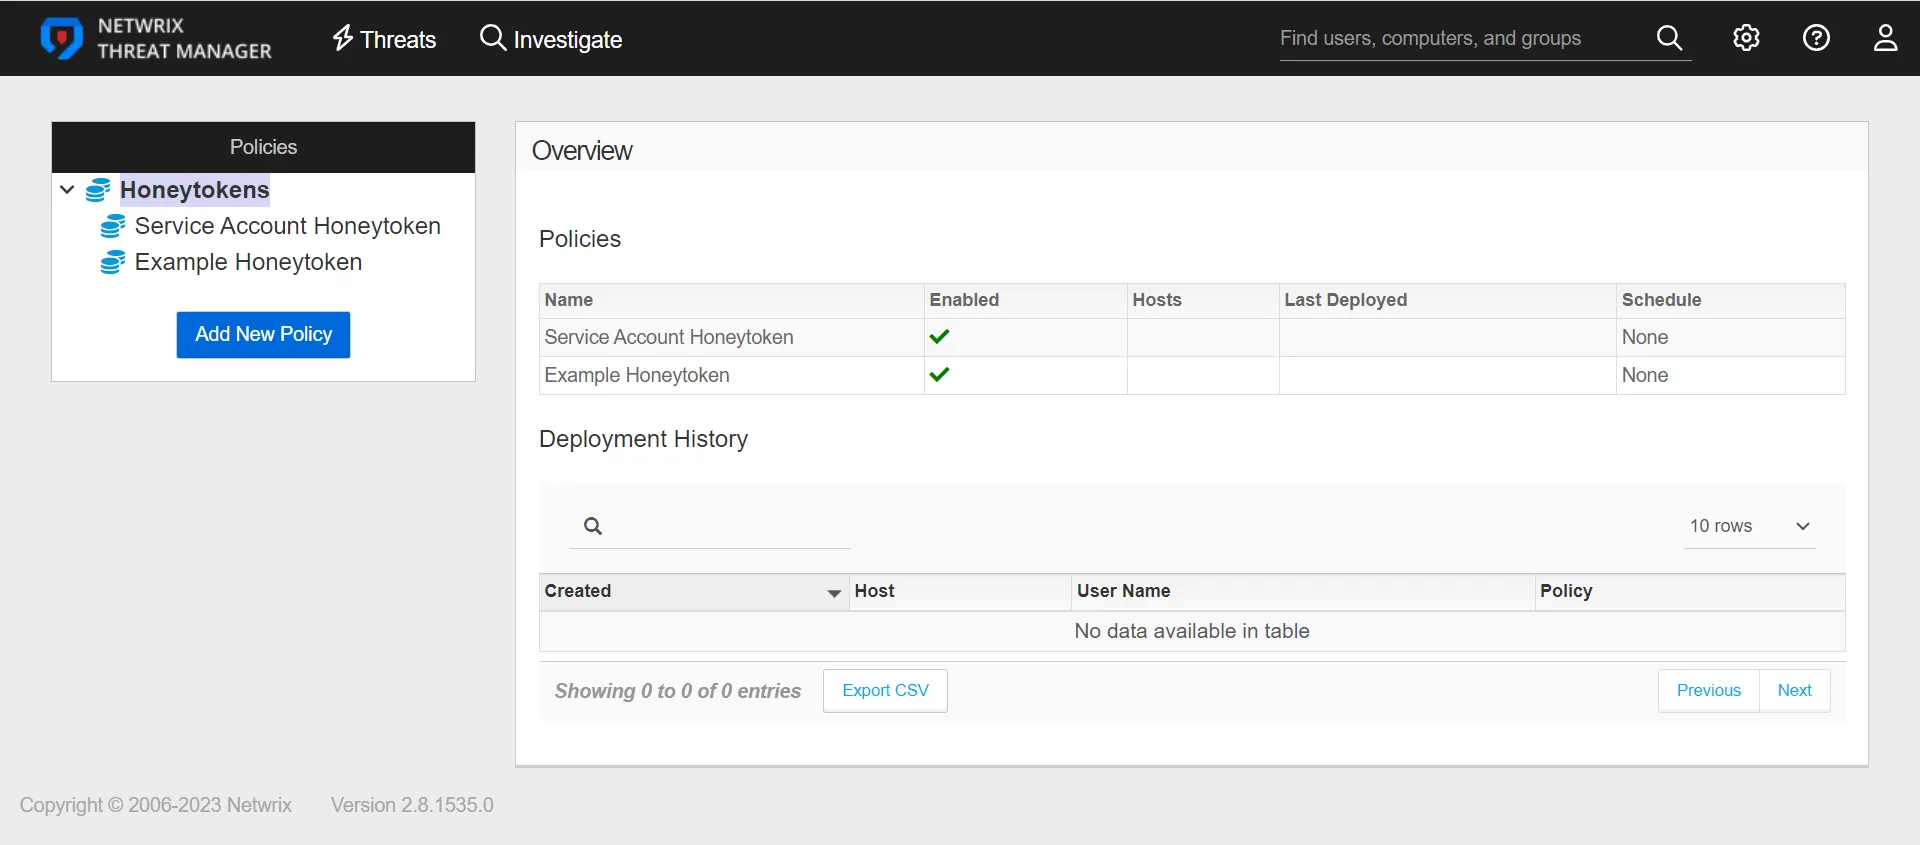
The Polices table displays the following information:
- Name – The policy name
- Enabled – A green checkmark indicates that the policy is enabled. A red x indicates that the policy is disabled
- Hosts – The number of hosts on which the policy is applied
- Last Deployed – The date and timestamp of the last policy deployment
- Schedule – The interval at which the policy deploys
The Deployment History table displays the following information:
- Created – When the policy was applied to a host
- Host – The host on which the policy was applied. If the host exists in the Threat Manager database, click the host link to go to the Host Details Page
- User Name – The user account associated with the policy. (In the case of a Honeytoken policy, the user account created by the Honeytoken policy.)
- Policy – The policy name. Click the policy link to go to the Configuration tab for that policy.
The Policies page also lets you click a policy and view information and configuration options for that policy. See Policy Configuration for additional information.
Add a Policy for a Honeytoken
A Honeytoken-type policy adds Honeytokens, which are fake credentials stored in memory. When an attack scans memory they may try to authenticate or query the domain for information about the account. Policies for Honeytokens are added on the Policies page.
When a Honeytoken name is specified and the policy is enabled, this policy becomes immediately valid for Honeytoken threat detection. See Configure Honeytoken Threats for Honeytoken naming best practices.

Step 1 – In the Policies box, click Add New Policy. The Add Profile window opens.
Step 2 – In the Type dropdown list, select Honeytoken.
Step 3 – Enter the following information:
-
Name – The name for the policy
noteSee Configure Honeytoken Threats for best practices for naming a Honeytoken.
-
Description – The description for the policy
-
Enabled – The policy is set to OFF or disabled by default. Click the red X to set the Honeytoken to ON and enable it.
Step 4 – Click Add.
The Honeytoken policy is listed in the Policies box. Repeat the process to add additional policies for Honeytokens.