Microsoft Entra ID Configuration
For enhanced security, you can integrate Microsoft Entra ID OpenID Connect with Threat Manager using Proof Key for Code Exchange (PKCE).
Ensure the following requirements are met before configuring Microsoft Entra ID OpenID Connect in Threat Manager.
- Full Netwrix Threat Manager version 3.0.473+ or Release Only (RO) 3.0.90+ is installed
- Direct users (not groups) are supported in the Access User List
- MSAL.js 2.0 version is supported. See the Microsoft MSAL.js 2.0 is now generally available with support for authorization code flow article for additional information.
First, you need to register an application for Threat Manager in Microsoft Entra ID and then use the registered application's information for configuring Microsoft Entra ID OpenID Connect in Threat Manager.
Register and configure an application
Step 1 – Log in to Microsoft Entra admin center (https://portal.azure.com/) with a user that is part of the “Global Administrator” role or any role that has rights to register an app, such as the “Application administrator” role. This is required to give consent to certain permissions in the application.
Step 2 – In the Microsoft Entra admin center, go to Microsoft Entra ID > App registration and click New registration.
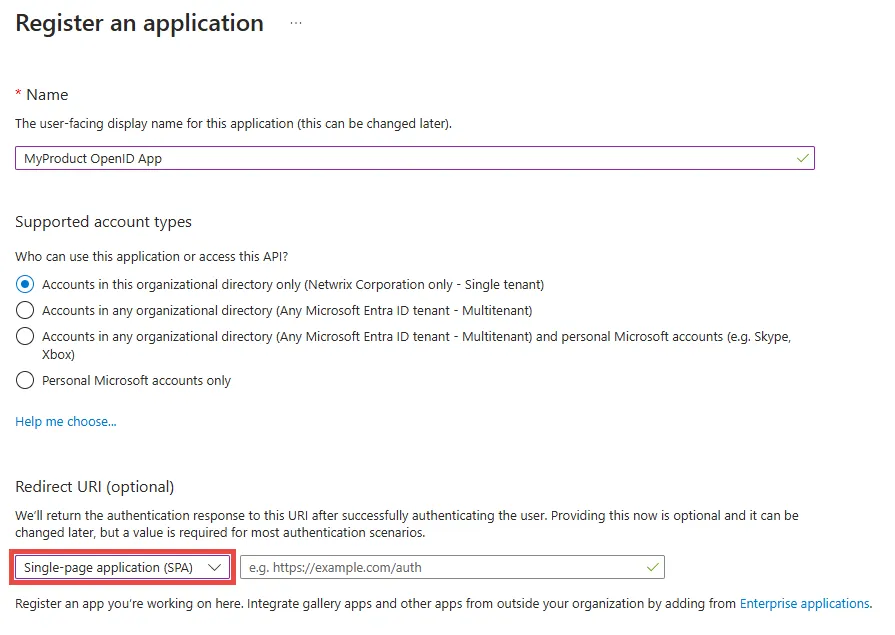
Step 3 – Fill out the Name field, for example, MyProduct OpenID App.
Step 4 – Choose one of the options in the Supported account types section based on your needs, for example, Accounts in this organizational directory only.
Step 5 – In the Redirect URI section, select the Single-page application (SPA) option from the Select a plateform dropdown.
Step 6 – Enter the URL in the following specified format
{HTTP/S protocol}://{IP address or DNS name}:{port if needed}/callback
-
HTTP/S protocol – Use depending on your configuration (http or https)
-
IP address or DNS name – Provide the domain name or IP address, (for example, threatManager.MyCompany.com or 192.168.74.200)
-
Port – Threat Manager’s default port is 8080, but it could be changed according to your needs
-
End the URL with /callback
The full Redirect URL uses one of the following formats:
Step 7 – Click Register.
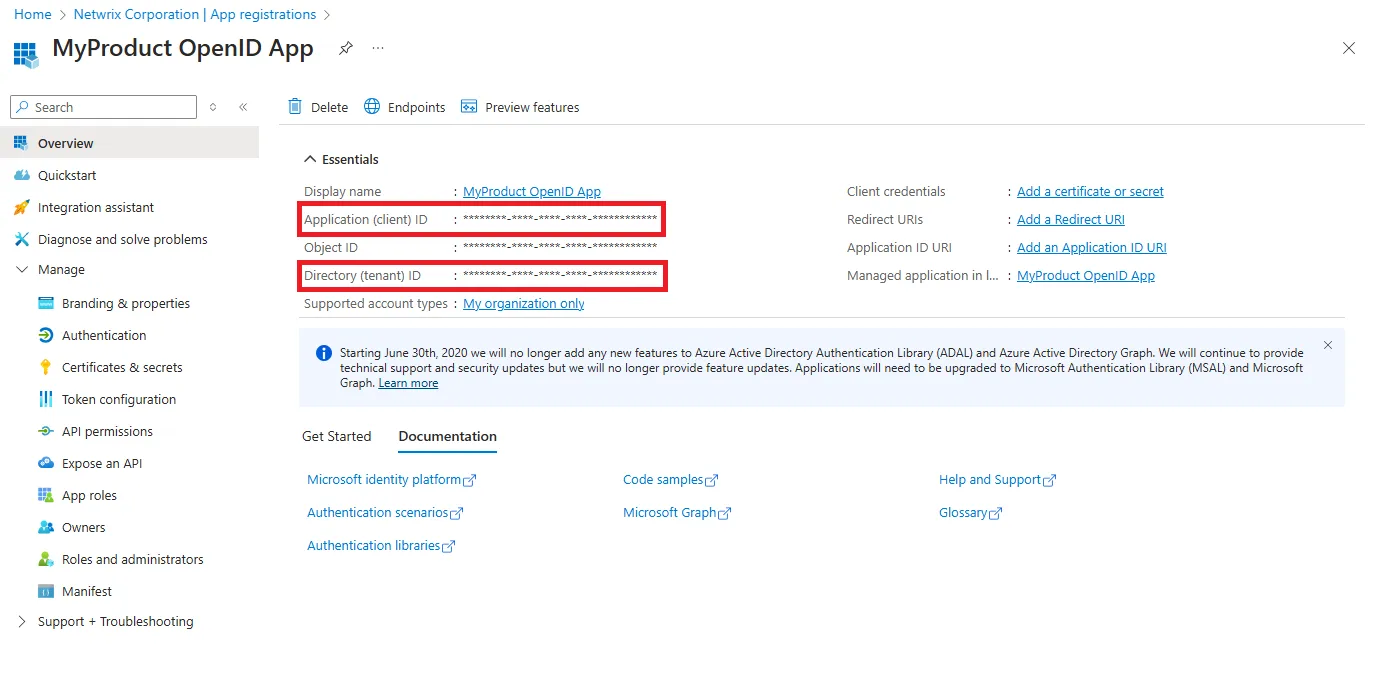
Step 8 – The Overview page is displayed. Copy the Application (client) ID and Directory (Tenant) ID and keep them safe.
Step 9 – In the left pane, select Authentication.
Step 10 – In the Implicit grant and hybrid section, select the Access tokens as necessary to support the implicit flow, especially for Single-Page Application (SPA).
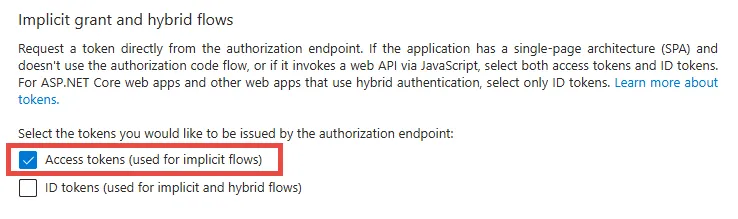
Step 11 – Click Save.
Step 12 – Under the Manage section, select Token Configuration.
Step 13 – Click Add optional claim.
Step 14 – Select ID token type.
Step 15 – In the Claim column, select the onprem_sid checkbox.
Step 16 – Click Add.
Step 17 – Click Add optional claim.
Step 18 – Select Access token type.
Step 19 – Check onprem_sid field.
Step 20 – Click Add.

Configure Entra ID OpenID Connect
Step 1 – On the Integrations interface, select the OpenID Authentication Provider under the Authentication Provider node.
The page for the OpenID provider had two tabs:
- Configuration
- Users/Groups
Configuration Tab
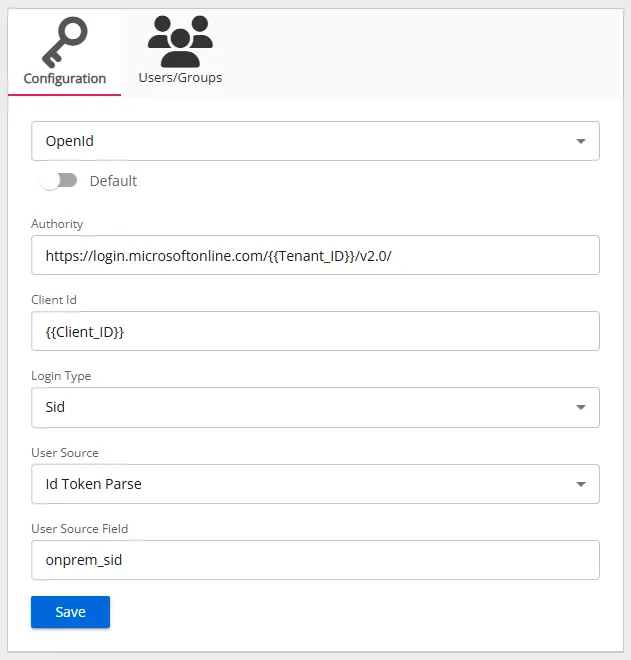
- Default – The default profile applied when a user is assigned multiple authentication profiles. When off, Threat Manager determines the profile in alphabetical order of the profile name. Toggle off and on as desired.
- Authority – The Microsoft Entra ID OpenID Connect provider authority URL. It should be in the
following format:
https://login.microsoftonline.com/{Tenant ID}/v2.0Use the tenant ID of the registered application. - Client Id – The ID assigned to the registered application in Microsoft Entra ID.
- Login Type – The login type to use to log into the account. For Microsoft Entra ID, select Sid from the dropdown list.
- User Source – The source type to use to validate the user from the token. For Microsoft Entra ID, select Id Token Parse from the dropdown list.
- User Source Field – The field in the token to use for validating the user. For Microsoft Entra ID, select onprem_sid from the dropdown list.
Users/Group Tab
The Users/Groups tab displays users and groups assigned to this authentication profile. To give access to the application to new users, click the New Access button, which opens the Add Console Access window. To assign this authentication provider to existing users, go to System Settings > User Access Page.
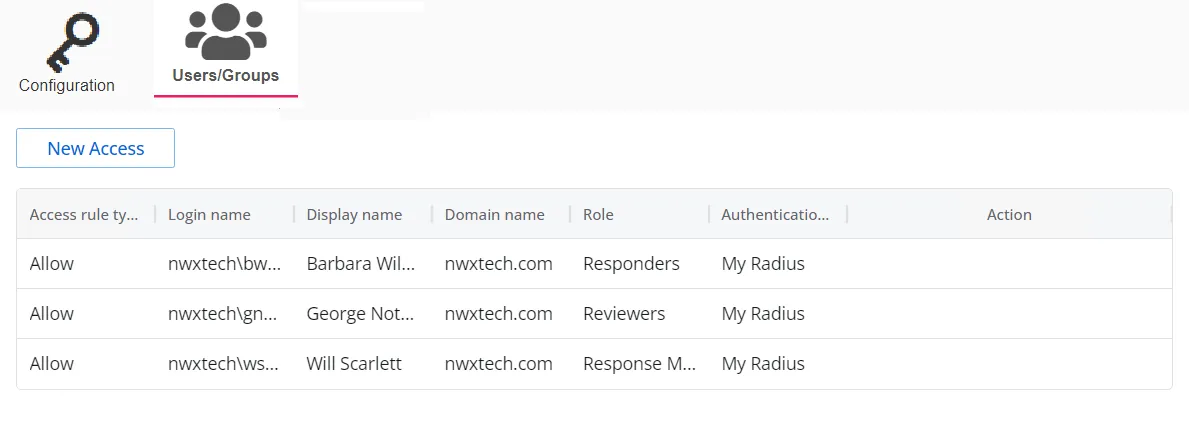
The table displays the following information:
-
Access rule type – Indicates the access type as Allow, which enables console access, or Deny, which disables console access
-
Login name – The NTStyle domain name for the user or group account
-
Display name – The display name for the user or group account
-
Domain name – Name of the domain. This may be either the domain DNS name or domain controller hostname.
-
Role – The role assigned to the user or group for accessing this application
-
Authentication Type – Type of MFA authentication assigned to the user or group
-
Action – This column has the following icons for conducting actions on the user or group:
- Edit icon – Lets you edit the columns in the selected row by enabling dropdown menus. The edit icon changes to a save icon while in edit mode.
- Trash icon – Opens a Warning window to confirm the action of deleting the user or group. Removing a user or group removes console access for it.
- Reset MFA button – Forces the user or every user in the group to reconfigure MFA on the next login. This option is only available if an MFA authentication type is applied to the user or group.
Troubleshooting
In case the Microsoft Entra ID OpenID Connect configurations don't work and an error is displayed, you can perform the following steps to troubleshoot the error.
Step 1 – Open any site or tool that provides the possibility to decode a JWT token, for
example, https://jwt.io/.
Step 2 – Right-click the Threat Manager login page and select Inspect. The Dev Tools page opens.
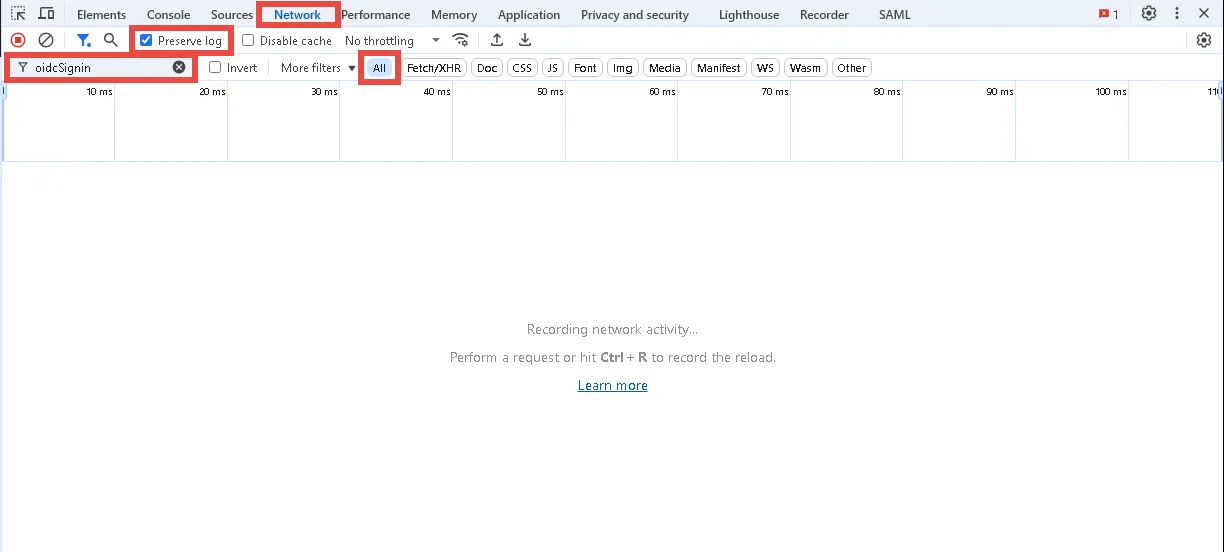
Step 3 – Click the Network tab and select the Preserve log checkbox.
Step 4 – Enter oidcSignin in the Filter field and select All to show all requests.
Step 5 – Click the Microsoft Entra ID OpenID Connect button on the Threat Manager login page.
Step 6 – Log in to Microsoft Entra ID.
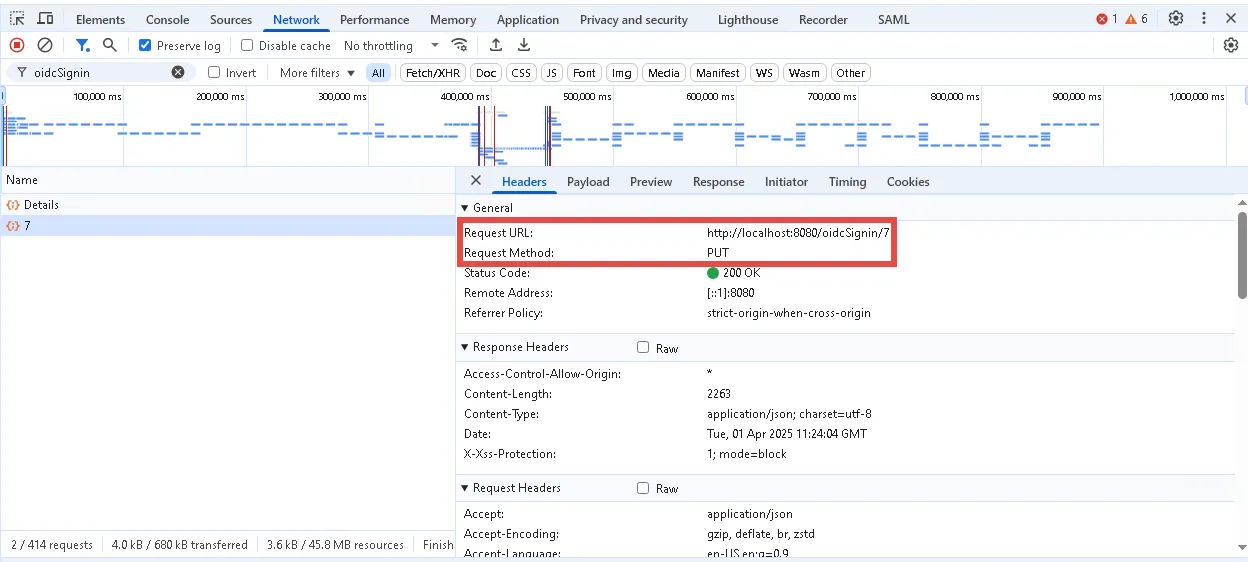
Step 7 – On the Dev Tools page, find a request with the PUT method which has the following format:
{HTTP/S protocol}://{NTM IP address or DNS name}:{port if needed}/oidcSignin/{ID}
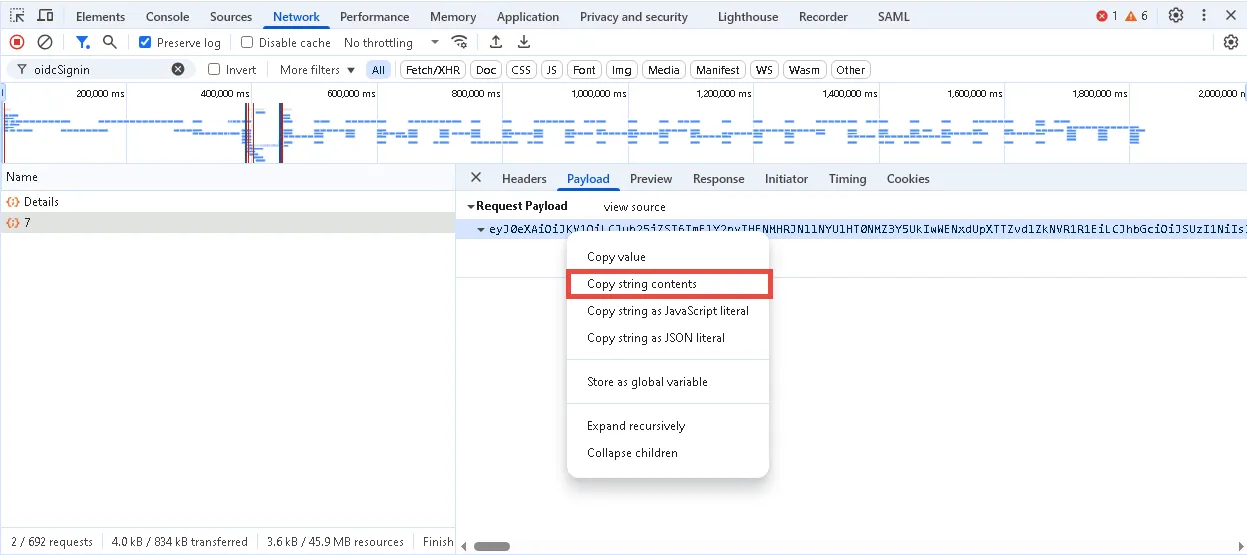
Step 8 – Open the Payload tab and copy the value from the Request Payload box.
Step 9 – Open https://jwt.io/ and insert the Request Payload value in the ENCODED VALUE
section.
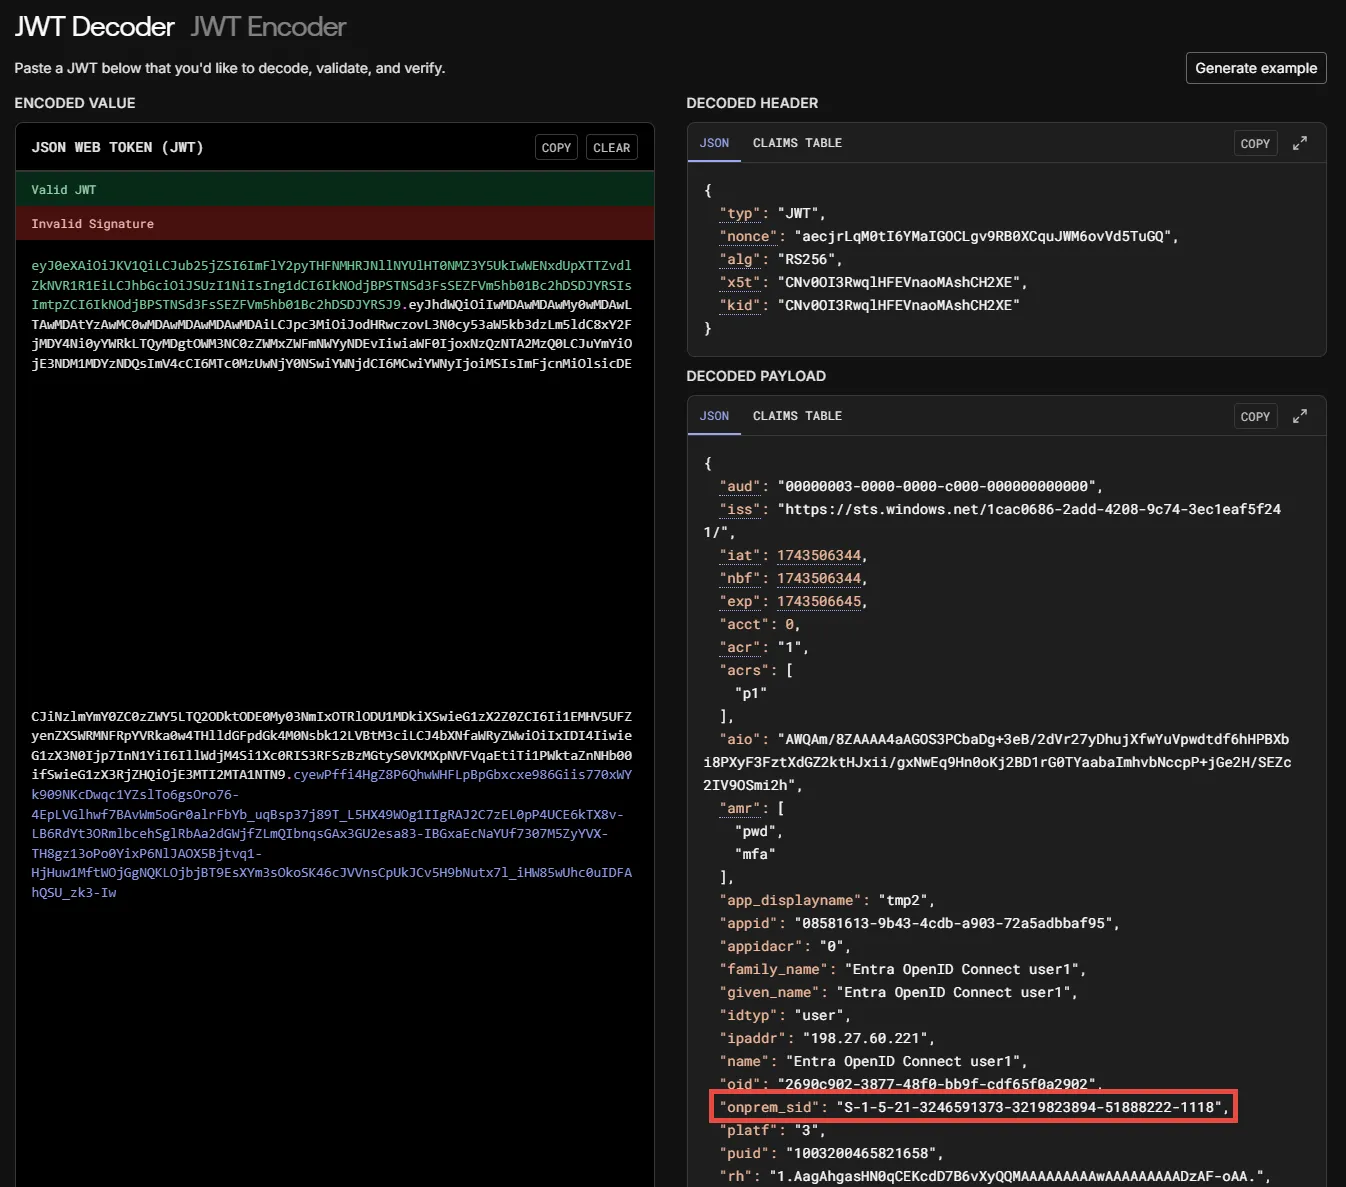
Check that the field from the claims setting exist and has the value. If claims don’t exist, check the claims configuration in Microsoft Entra ID.