Single Sign-On (SSO) — Customer Request Guide
PolicyPak Cloud supports Single Sign-On (SSO) using your organization's identity provider (IdP) — such as Microsoft Entra ID (Azure AD) or Okta. Once configured, users can log in to PolicyPak Cloud using their existing corporate credentials instead of a separate password.
This is an assisted process. The steps below explain what information to submit, what the Netwrix team does on the backend, and what you need to complete on your end to finish the configuration.
After submitting your ticket, allow up to three (3) business days for the Netwrix team to complete the backend tenant provisioning. You will be notified when your environment is ready.
What You Will Need Before Submitting
Have the following ready when you open your support ticket:
- Your PolicyPak Cloud company name and the email address of your current company administrator
- Your identity provider type: Microsoft Entra ID, Okta, or another OIDC-compatible provider
- The email domain your users will authenticate with (for example, yourcompany.com)
- Access to an Entra ID or Okta admin who can register an application and generate a Client ID and Client Secret
Step 1 – Open a Netwrix Support Ticket
Open a ticket through the Netwrix support portal.
In your ticket, select Netwrix PolicyPak, include the information listed above, and request "PolicyPak Cloud SSO setup."
The PolicyPak Support team will receive your ticket and coordinate with the Netwrix internal team responsible for tenant provisioning. You don't need to contact any other team directly.
The backend provisioning step is performed by a specialized internal Netwrix team and is not automated. Allow up to three business days for this step to complete.
Step 2 – Netwrix Provisions Your 1Secure Tenant (No Action Required)
Once your ticket is received, the Netwrix internal team creates a Netwrix 1Secure tenant for your organization and invites your designated administrator using their corporate email address. This step happens entirely on the Netwrix side.
This step is complete when you receive a "Welcome to Netwrix 1Secure" invitation email in your inbox.
Step 3 – Accept the Netwrix 1Secure Invitation Email
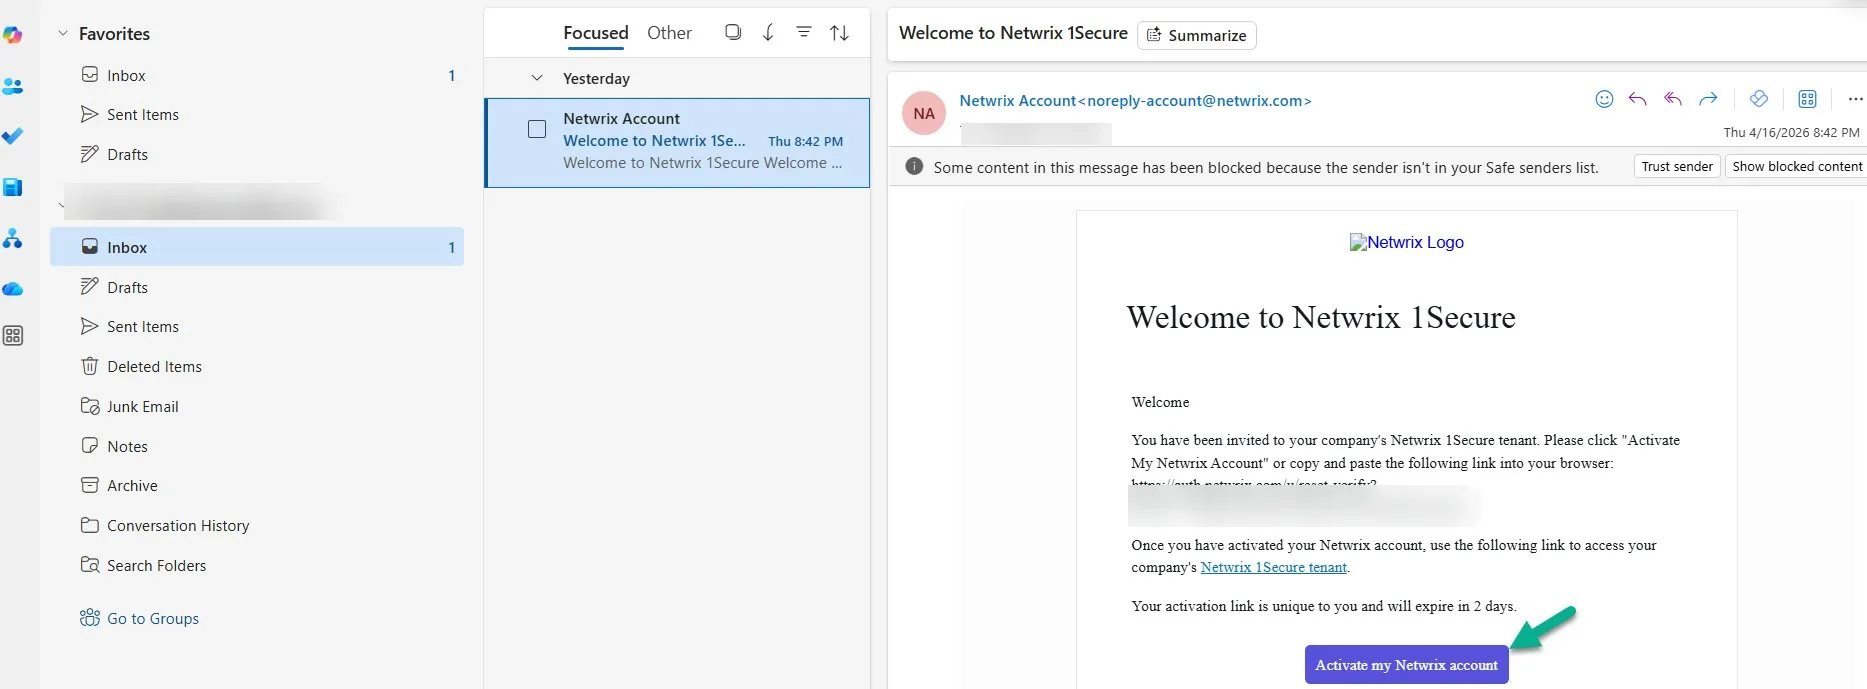
Your designated administrator will receive a "Welcome to Netwrix 1Secure" email from noreply-account@netwrix.com. Open the email and click Activate my Netwrix account.
The activation link is unique to your account and expires in 2 days. Act on it promptly.
Step 4 – Set Your Netwrix Account Password
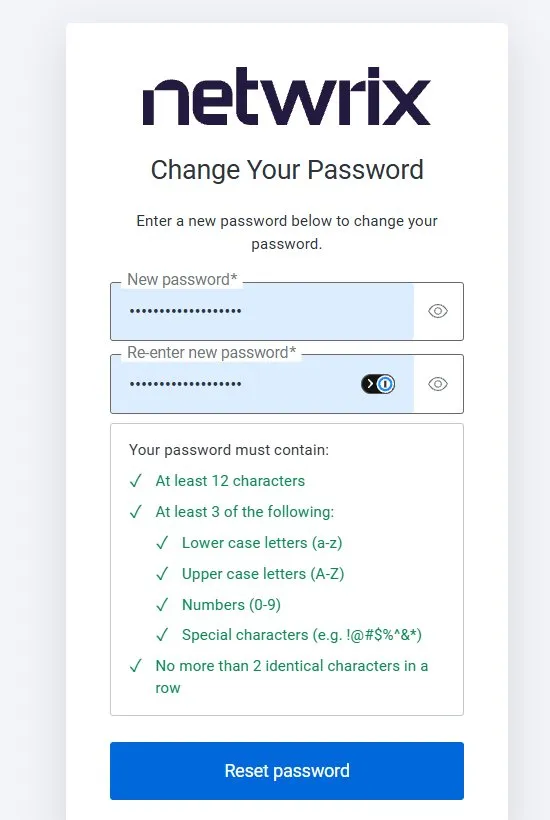
If the user is not already provisioned, clicking the activation link prompts you to create a password for your Netwrix account. This is a one-time step required to access the 1Secure portal where SSO is configured.
Your password must meet the following requirements:
- At least 12 characters
- At least 3 of the following: lowercase letters (a–z), uppercase letters (A–Z), numbers (0–9), special characters
- No more than 2 identical characters in a row
Step 5 – Configure SSO in Netwrix 1Secure
Once your account is activated, navigate to the Netwrix 1Secure portal and sign in.
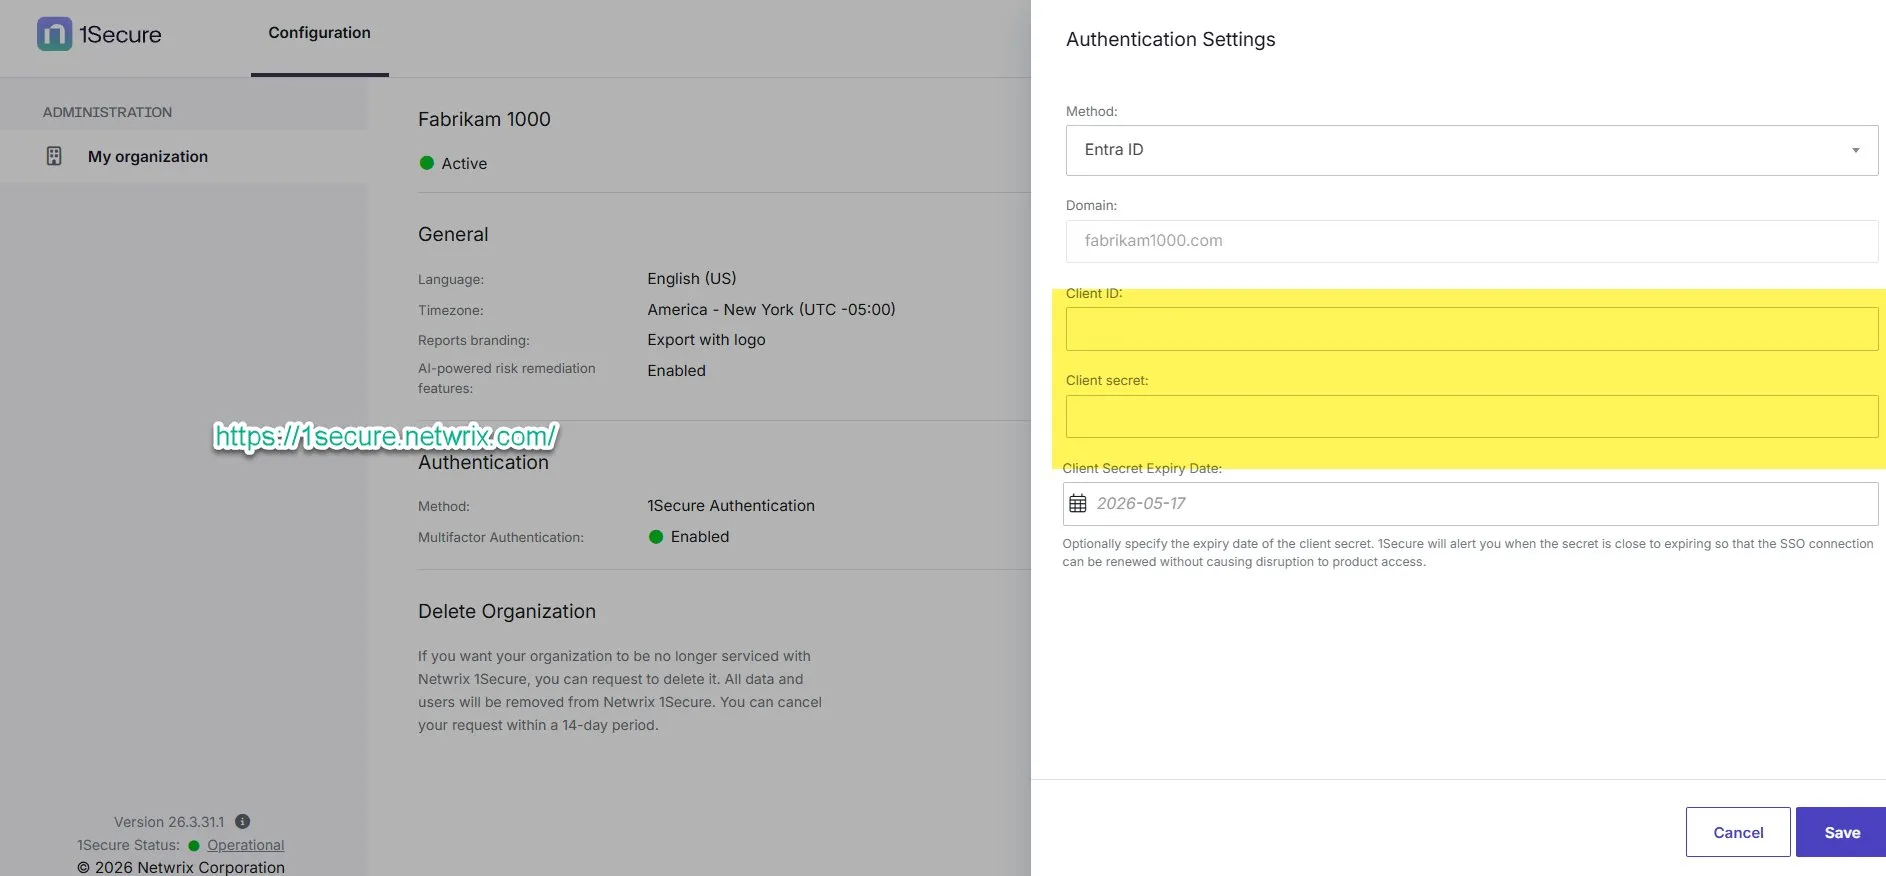
Go to Configuration > My Organization > Authentication, then open Authentication Settings. Select your SSO method (Entra ID or OIDC for Okta), enter your domain name, and supply the Client ID and Client Secret from your identity provider.
Use the following Netwrix documentation guides to register your application and obtain these values:
Optionally enter a Client Secret Expiry Date. Netwrix 1Secure will alert you before the secret expires so your SSO connection can be renewed without disrupting access.
Step 6 – Add Your Federated User as a PolicyPak Cloud Administrator
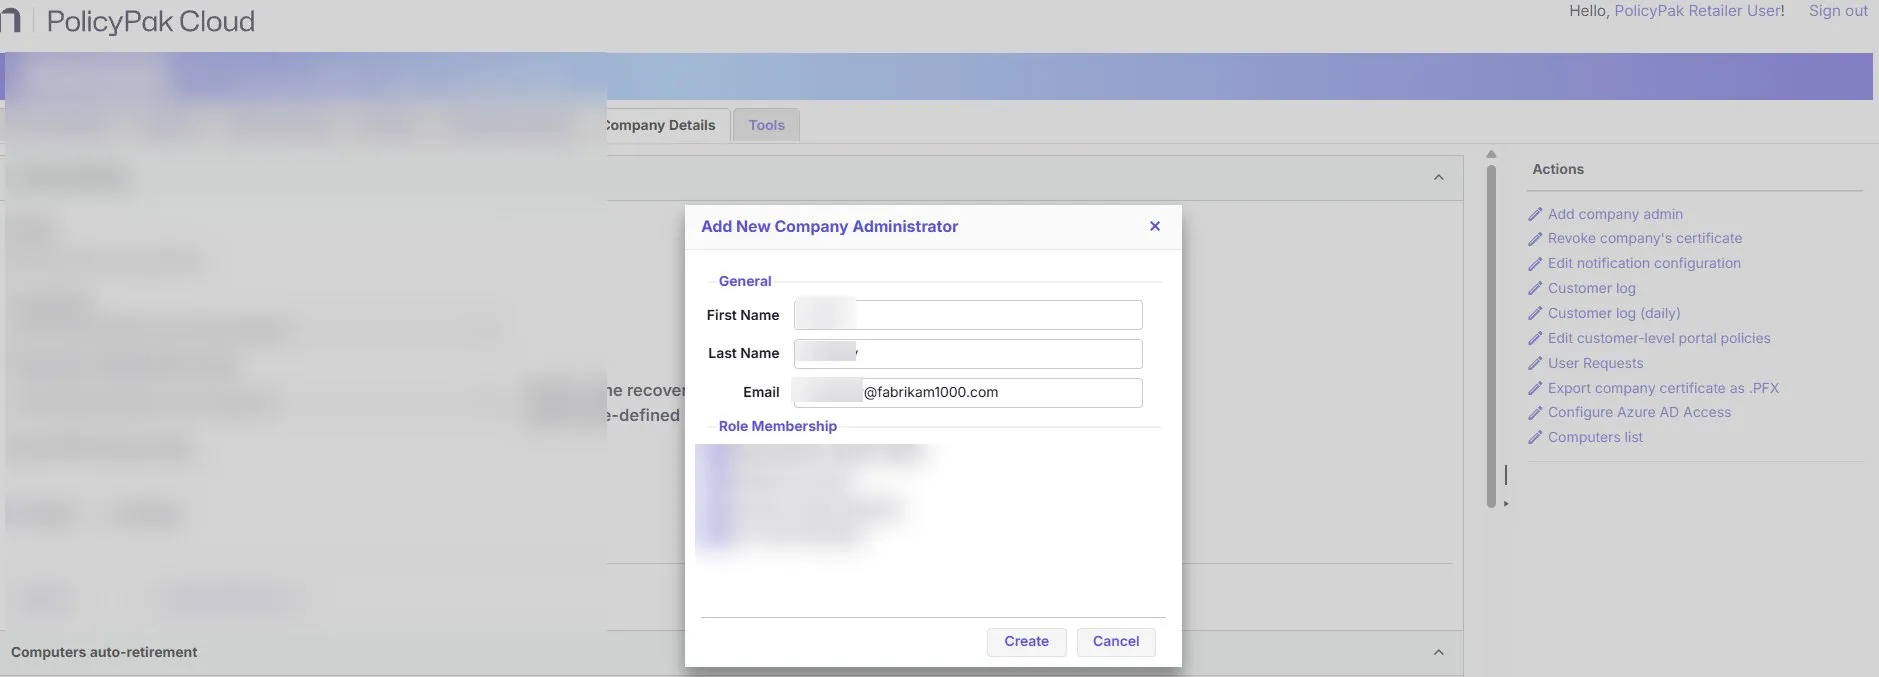
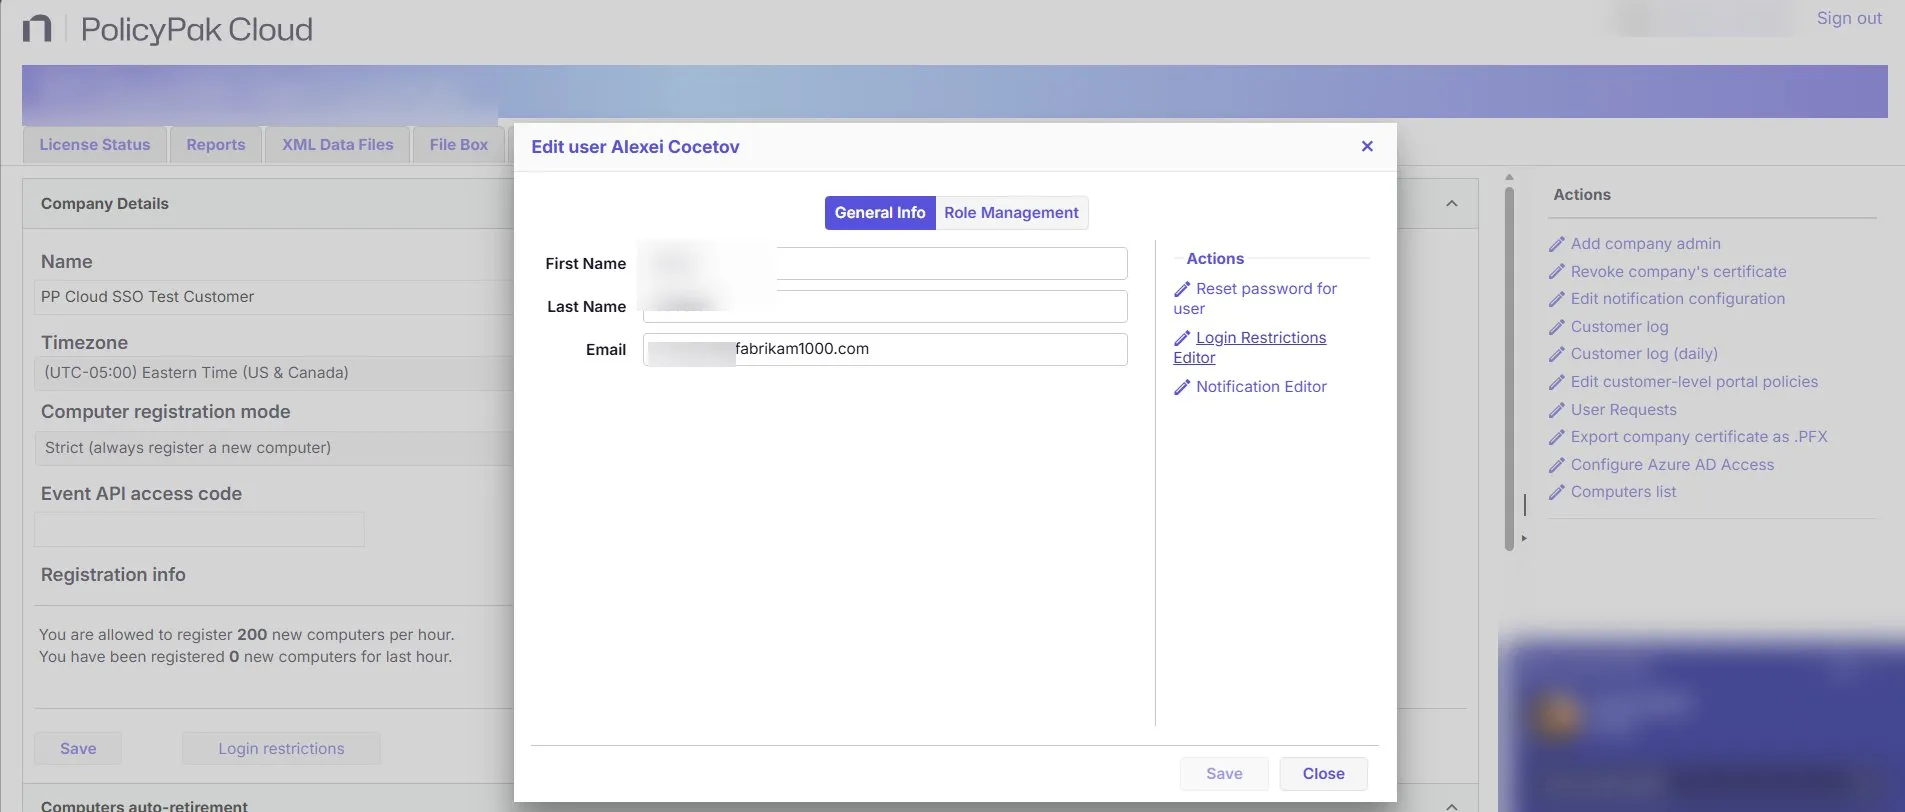
Once SSO is configured in 1Secure, return to the PolicyPak Cloud portal. Navigate to your company's administration area and use the Add New Company Administrator dialog to add your Entra ID or Okta user as an administrator.
Enter the user's first name, last name, and their federated email address — the same address associated with your identity provider — then click Create.
Step 7 – Sign In to PolicyPak Cloud with SSO
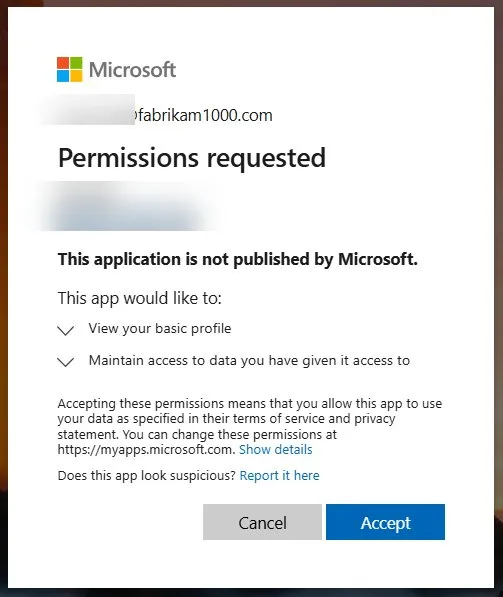
Your federated administrator can now sign in to PolicyPak Cloud using their corporate identity. On first login, your identity provider may display a permissions consent prompt for the 1Secure application. Click Accept to grant the necessary permissions and continue.
The permissions requested are limited to viewing your basic profile and maintaining access to data you have already authorized. This is a standard consent screen for OIDC-based applications.
After accepting, you will be redirected back to PolicyPak Cloud and signed in as your federated user. SSO is now fully active for your domain.
Summary
- Open a Netwrix support ticket requesting PolicyPak Cloud SSO setup. Include your company name, admin email, IdP type, and domain.
- The Netwrix internal team provisions your 1Secure tenant within 3 business days. No action required from you.
- Accept the "Welcome to Netwrix 1Secure" invitation email and click the activation link.
- Create your Netwrix account password when prompted.
- Log in to 1secure.netwrix.com and configure SSO using your IdP's Client ID and Client Secret.
- Add your federated user as a Company Administrator in the PolicyPak Cloud portal.
- Sign in to PolicyPak Cloud with your corporate SSO credentials and accept the IdP consent prompt on first login.
Questions or Issues?
If you encounter any issues at any stage of this process, reply to your existing support ticket or open a new one through the Netwrix support portal. The PolicyPak Support team will assist you and coordinate with the appropriate internal team as needed.