Jira Forge Set Up
The steps below show detailed instructions and prerequisites on how to set up Platform Governance Jira Integration.
Prerequisites
- Install the latest Netwrix Platform Governance(Strongpoint) bundle
- Install the latest Netwrix Platform Governance Jira bundle
- Install the latest version of the Netwrix Platform Governance Jira Forge app
- Set up NetSuite Token-based Authentication Credentials
- Set up Jira Credentials
- Set up Jira Status Mapping
- Set up Jira Project Keys
- Set up Jira TBA Credentials
Install the latest Netwrix Platform Governance(Strongpoint) bundle
Netwrix Platform Governance(Strongpoint) bundle is a key prerequisite for Jira Forge to work. It is required that your NetSuite account is installed with the latest version or at least 7.7.5 or above.
For installation details you may refer to the installation guide found in Installing Platform Governance for NetSuite.
If the latest version of the bundle is already installed, you may skip this part.
Install the latest Netwrix Platform Governance Jira bundle
This step will require a user to have NetSuite account access and an Administrator role for that account. This bundle must be version 2.0 or higher to work properly. The Netwrix Platform Governance Jira bundle is a non-managed bundle, check the Community regularly for the latest updates and announcements.
If the latest version of the bundle is already installed, you may skip this part.
- Log in to the NetSuite account and navigate to Search & Install Bundles page.
- In the Dashboard main menu: Customization > SuiteBundler > Search & Install Bundles
- In the KEYWORDS field, search for 311231. This is the bundle ID for Netwrix Platform Governance Jira bundle
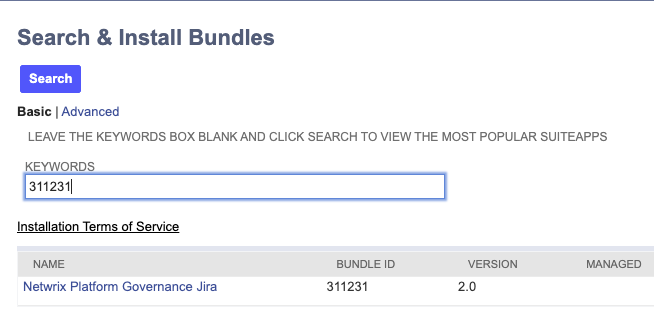
- Click Netwrix Platform Governance Jira bundle in the search results.
- Click Install when the Bundle Details opens.
- Click Install Bundle on the Preview Bundle Install page.
Install the latest version of the Netwrix Platform Governance Jira Forge app
This process requires access to the Atlassian Marketplace and Administrator permissions on the Jira instance where the app is installed.
- Go to the Atlassian Marketplace.
- In the search bar, type in either of the keywords: Netwrix Platform Governance or Strongpoint(this is the product's previous name).
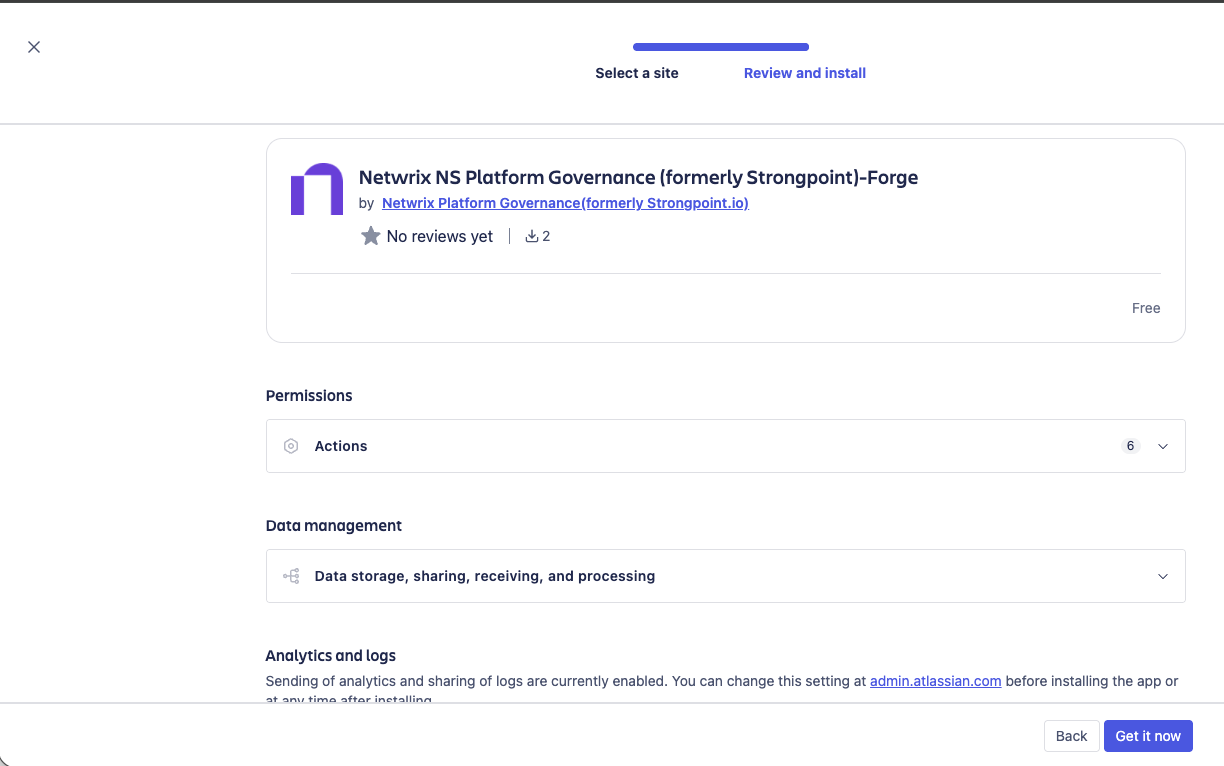
- You should see a number of products displayed, select Netwrix NS Platform Governance (formerly Strongpoint)-Forge.
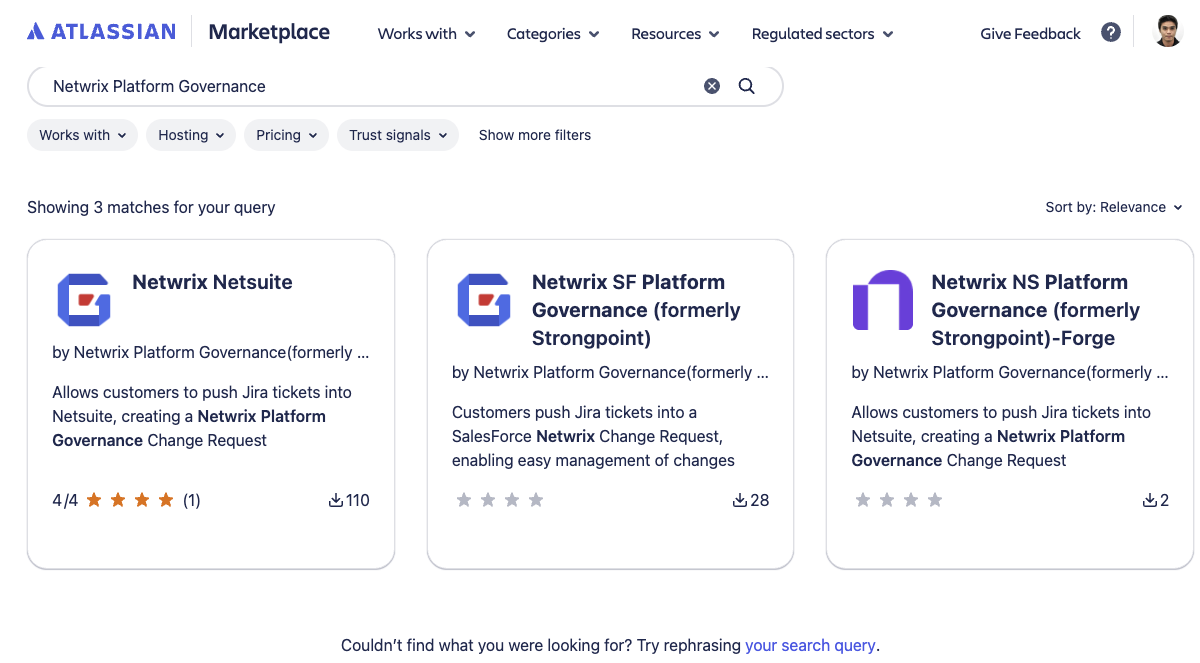
- After selecting, you are redirected to the product overview page.
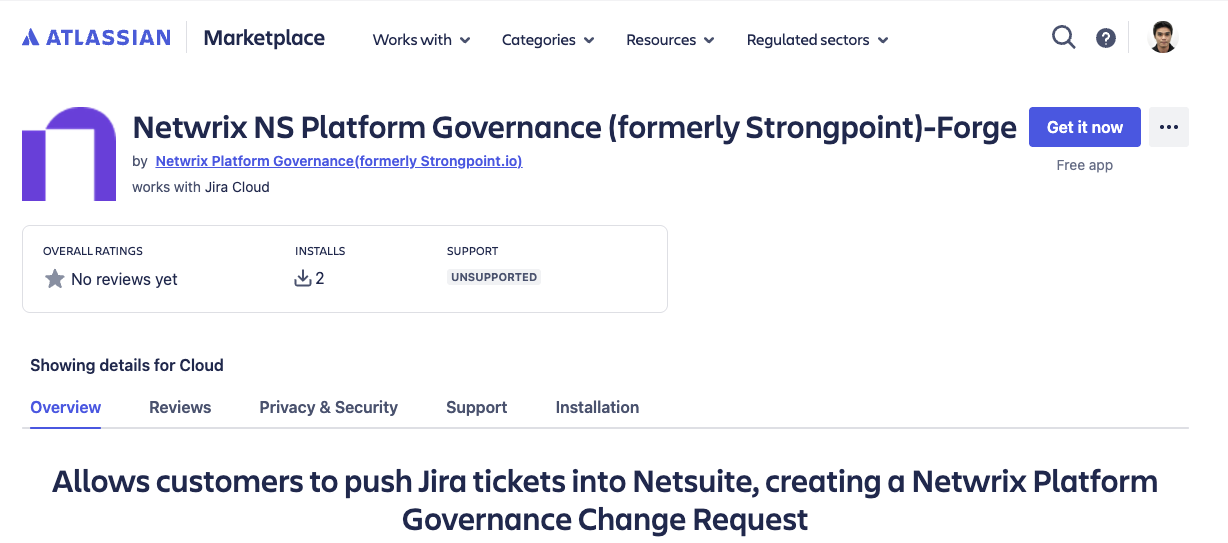
- Click the Get it now button found at the upper-right part of the page.
- You are redirected to the installation process. Select the Jira instance where you want to install Netwrix Platform Governance Forge
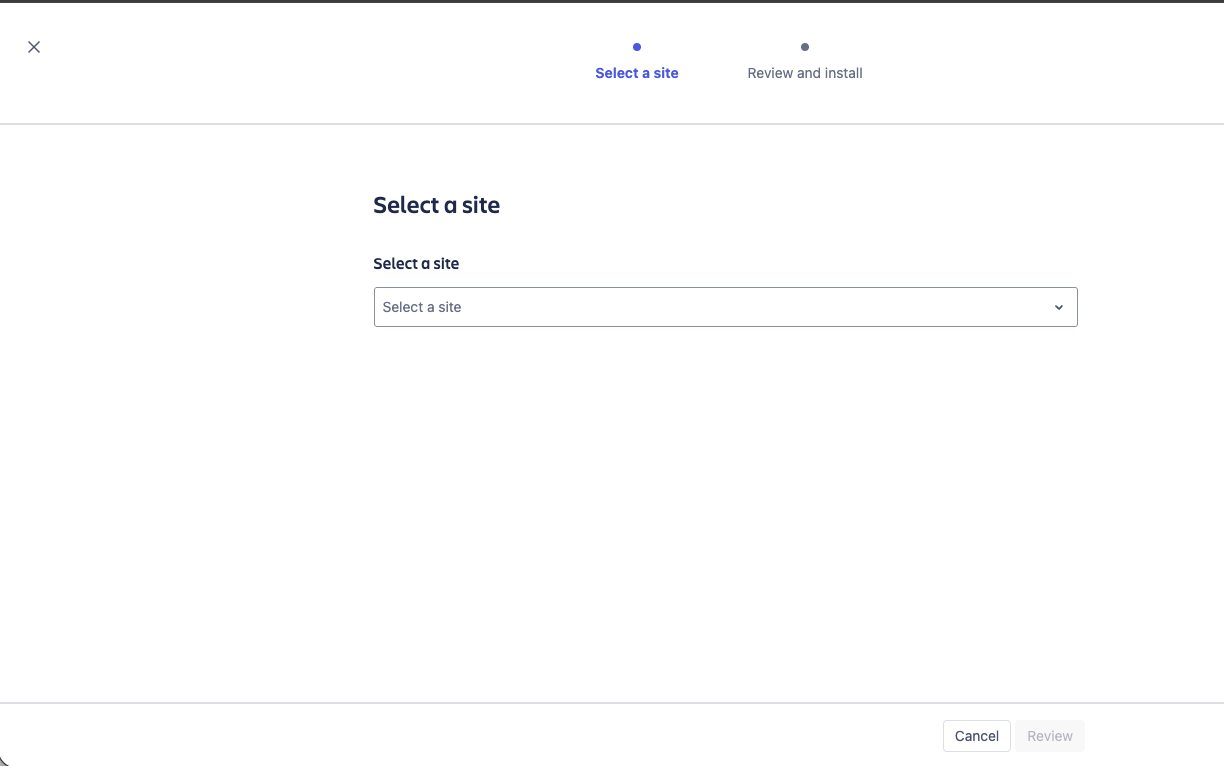
- Click Review
- Review the app Permissions and Data management. All of these have been strictly reviewed by the Atlassian team and adhere to their security policies. When ready, click Get it now button.
Set up NetSuite Token-based Authentication Credentials
This step will require a user to have NetSuite account access and an Administrator role to that account.
Token Based Authentication is set up through NetSuite. The basic process is as follows:
-
NetSuite Administrator creates an Integration Record for the Platform Governance for NetSuite application. This only needs to be performed once per account. Open Setup > Integration > Integration Management > Manage Integrations > New. See the NetSuite help article "Create Integration Records for Applications to Use TBA" for details. To view a list of integration records in this account, open Setup > Integration > Integration Management > Manage Integrations.
noteTake note of these values and keep them secure.
-
Each user creates their token in NetSuite. Refer to the NetSuite help Manage TBA Tokens in the NetSuite UI for details. After you create your tokens, add them to Jira.
-
Create an Access Token by navigating to main menu, Setup > Users/Roles > Access Tokens > New.
-
Fill the fields with the following values:
- Application Name: The Integration Record that was created in Step 1.
- User: Select yourself (Employee Record).
- Role: STRONGPOINT DEVELOPER ROLE
- Token Name: Token name of your choice
- Skip checking Inactive checkbox
-
Click 'Save'.
noteYou can also create a Token Based Authentication for your NetSuite Administrator role. Follow the steps below:
- Log in as an Administrator role in NetSuite.
- In your NetSuite account dashboard, navigate to the bottom left part of the page. Under Settings, you should see Manage Access Tokens. Click the link.
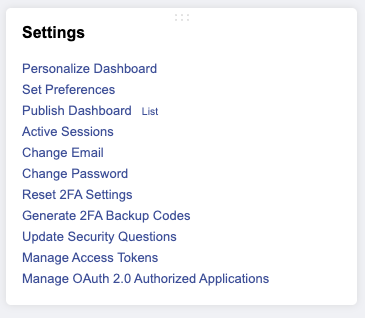
- On the My Access Tokens page, click the New My Access Token button to create a TBA record for your Administrator role.
- Select an Application Name (Integration record) for this token.
- Click Save.
IMPORTANT: Take note of these values and keep them secure.
Set up Jira Credentials
This step requires Jira instance access and NetSuite account access.
- Create a Jira token via this URL: https://id.atlassian.com/manage-profile/security/api-tokens
- Note the token value, as it is associated with your email address for the Atlassian/Jira ecosystem. Refer to the Atlassian documentation to obtain a Token.
- Have the following credentials ready
- Jira user email address
- Jira token generated above.
- In NetSuite, go to Netwrix Configuration and Stats by navigating in the main menu, Netwrix > Netwrix Support > Installation Settings. Only one record is displayed. Click Edit to open the Configuration and Stats page.
- Click 'Jira Integration' tab. Several fields are displayed. Turn your attention to Jira User and Jira Token fields.
- Populate these fields with the following values:
- Jira User - Jira user email address in step 2.
- Jira token - Jira token generated in step 1. Click 'Save'.
Set up Jira Status Mapping
To take advantage of the automatic synchronization feature, review your Jira statuses to be mapped to the Change Management statuses. When a ticket status is updated to a mapped status, Platform Governance for NetSuite handles the synchronization between Jira and NetSuite.
The mapping allows multiple Jira statuses to map to each Change Request status. The mapping is part of the Configure NetSuite and Jira procedure.
Refer to the Atlassian documentation for instructions on Defining status field values.
- In NetSuite, go to Netwrix Configuration and Stats by navigating in the main menu, Netwrix > Netwrix Support > Installation Settings. Only one record is displayed. Click Edit to open the Configuration and Stats page.
Enter the mappings between your Jira statuses and the Change Request statuses. For best practice, define your Jira statuses before this step. You can enter multiple Jira statuses for each Change Request status, separated by commas. For example, Ready for Deployment,Done. Assign your relevant mapping for each of the Change Request statuses:
Jira Statuses for In Progress Status
Jira Statuses for Pending Approval Status
Jira Statuses for Approved Status
Jira Statuses for Complete Status
Jira Statuses for Rejected Status
Jira Statuses for Canceled Status
-
Check Automatic Synchronization to enable Platform Governance for NetSuite to handle the synchronization between Jira and NetSuite when a Ticket status is updated to a mapped status, without having to click Push. If you are using an account where you don't want to create a Change Request, leave this unchecked so you can do your research or testing without generating Change Requests.
-
Check Allow NS to Jira Push to enable pushing NetSuite change requests into Jira. Otherwise, you can leave it as unchecked if you don't need to enable this feature.
Click 'Save'
Set up Jira Project Keys
This step requires Jira instance access where the Netwrix Platform Governance for NetSuite Jira Forge app is installed.
- In your browser, open your Jira application.
- In the left part of the page, there is a sidebar that lists shortcuts and apps that are installed in this Jira instance. Under Your Apps, click Netwrix NetSuite Settings.
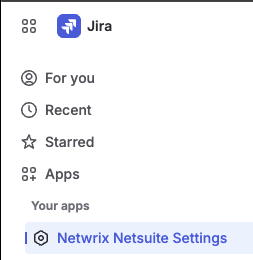
- The page has 2 tabs, Netwrix NetSuite TBA Credentials and Netwrix NetSuite Project Keys. Click the Netwrix NetSuite Project Keys tab.
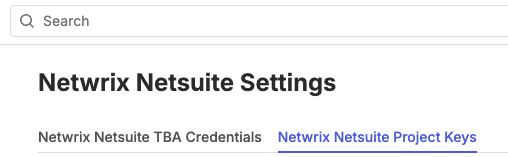
- Click New Project Key. A modal opens where you can add a Project Key.
- By defining a Project Key, the Platform Governance app can only be displayed and used within the project.
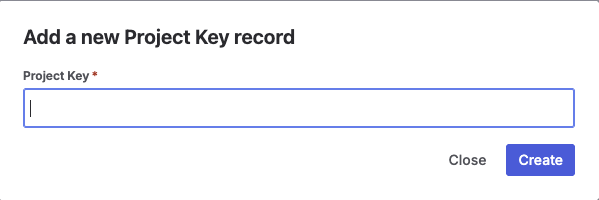
- Click Create. The new project key appears in the list.
Set up Jira TBA Credentials
This step requires Jira instance access where the Netwrix Platform Governance for NetSuite Jira Forge app is installed.
- In your browser, open your Jira application.
- In the left part of the page, there is a sidebar that lists shortcuts and apps that are installed in this Jira instance. Under Your Apps, click Netwrix NetSuite Settings.
- The page has 2 tabs, Netwrix NetSuite TBA Credentials and Netwrix NetSuite Project Keys. Click the Netwrix NetSuite TBA Credentials tab.
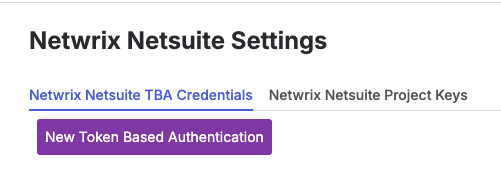
- Click New Token Based Authentication. A modal opens where you can add a TBA record to connect to a NetSuite account.
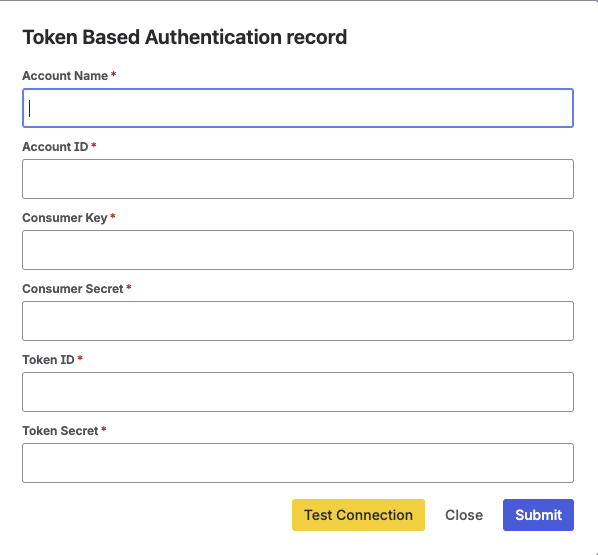
- Populate the fields.
- A 'Test Connection' button (yellow) can be found inside the modal, this button is used to test or check if the credentials and account you have are valid.
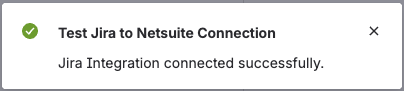
- Click Create. The new TBA record appears in the list.
Additionally, 'Update' and 'Delete' buttons are found on the right part of your record. Use these buttons to update or delete the record, respectively.

After completing this setup, you are ready to use the integration app.
The next page, Jira Forge Walkthrough, demonstrates how the app works.
Next Step: Jira Forge Walkthrough Example