1-FSAA System Scans Job
The 1-FSAA System Scans job collects access information from the targeted file servers.
Query for the 1-FSAA System Scans Job
The File System Scan query uses the FSAA Data Collector.
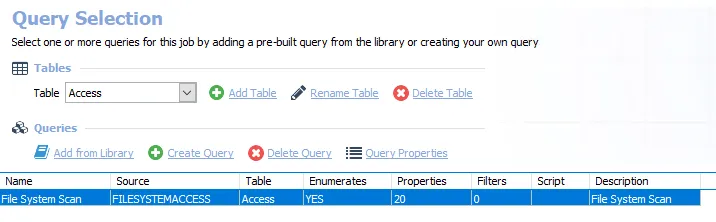
The following default configurations are commonly customized:
-
Default Scoping Options page > File Properties (Folder Summary) tab:
- Set to limit the Scan for Probable Owners, with Limit maximum number of probable owners to return per folder set to 5
- Set to Scan for file types, with Limit maximum number of file types to return per folder set to 5
-
Scan Server Selection page:
- Set to Local Server, or local mode scans
-
Default Scoping Options page > Scan Settings tab:
- Set to Limit subfolder scan depth to 2 levels
See the Recommended Configuration for the File System Solution topic for a complete list of customizable settings. See the Configure the (FSAA) File System Scan Query topic for additional information.
Configure the (FSAA) File System Scan Query
The 1-FSAA System Scans job has been preconfigured to run with the default settings with the category of File system access/permission auditing Scan. To customize the configuration, complete the following steps.
Step 1 – Navigate to the FileSystem > 0.Collection > 1-FSAA System Scans > Configure node and select the Queries node.
Step 2 – In the Query Selection view, click Query Properties. The Query Properties window opens.
Step 3 – Select the Data Source tab, and click Configure. The File System Access Auditor Data Collector Wizard opens.
Don't make changes to other wizard pages as they have been pre-configured for the purpose of this job.
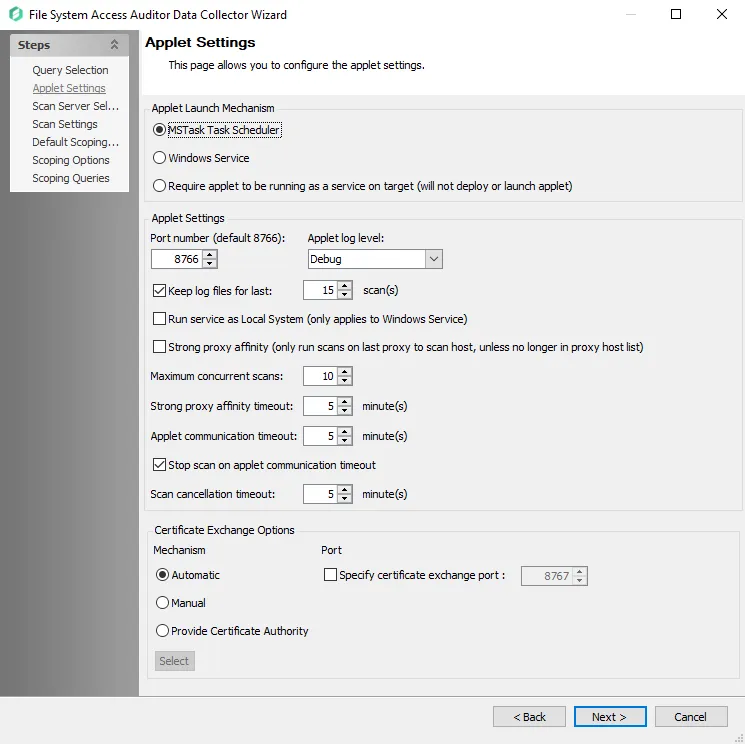
Step 4 – The Applet Settings page applies to the applet and proxy mode scans. If employing proxy servers, see the FSAA: Applet Settings topic for configuration instructions.
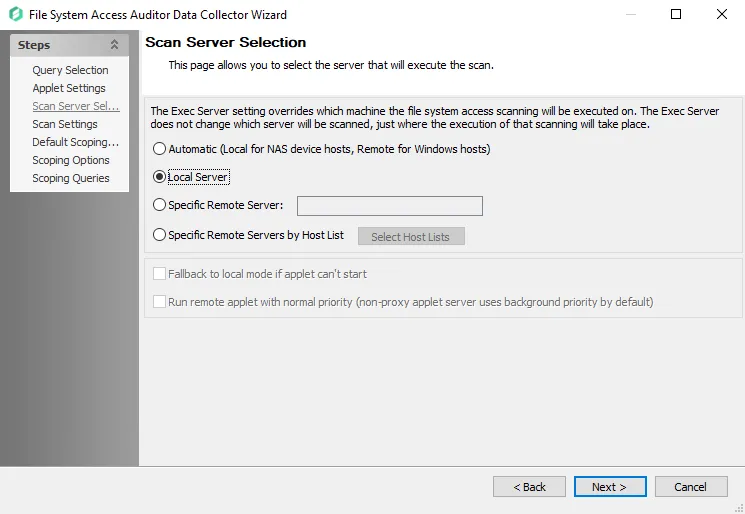
Step 5 – On the Scan Server Selection page, select the server that will execute the scan. See the FSAA: Scan Server Selection topic for additional information.
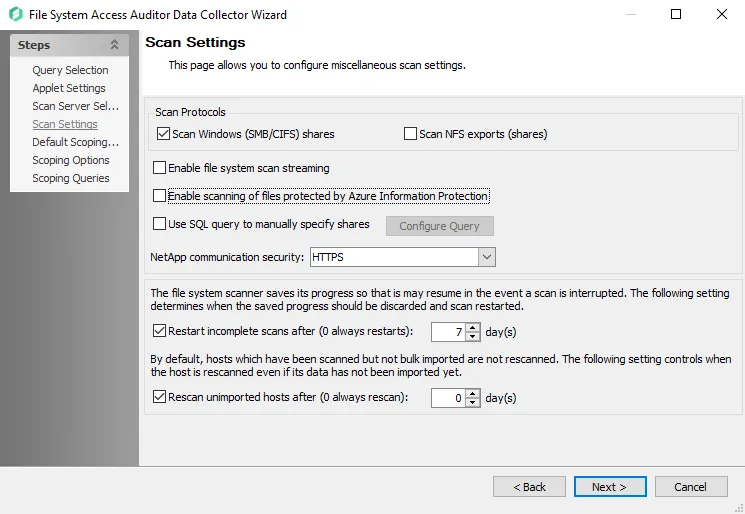
Step 6 – On the Scan Settings page, you can enable streaming. See the FSAA: Scan Settings topic for additional information.
If you enable streaming, you no longer need the 2-FSAA Bulk Import job as part of the 0.Collection job group.
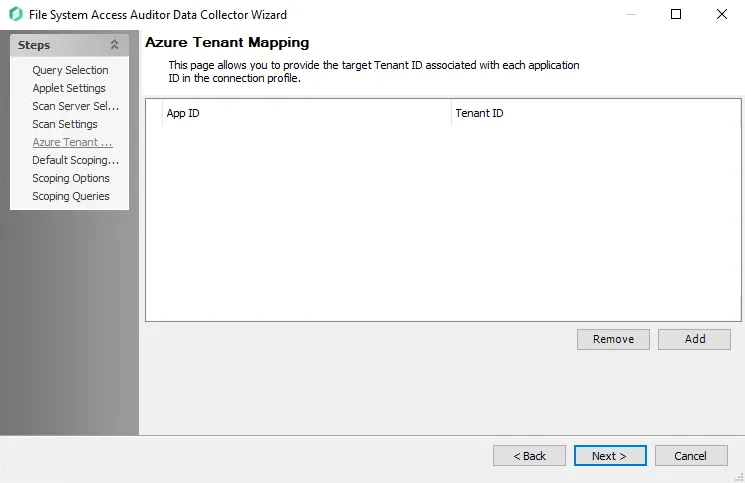
Step 7 – On the Azure Tenant Mapping page, add the AppPrincipalID (App ID) and Tenant ID. See the FSAA: Azure Tenant Mapping topic for additional information.
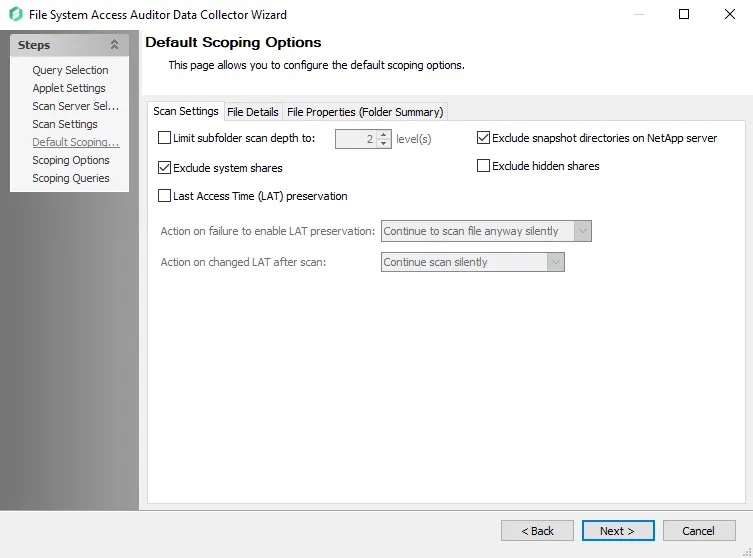
Step 8 – On the Default Scoping Options page, configure the following on the Scan Setting tab:
-
Limit subfolder scan depth to – Select this checkbox and use the arrow buttons to modify the subfolder scan depth
-
Exclude snapshot directories on NetApp server – Select this checkbox to exclude snapshot directories on NetApp server
-
Exclude system shares – Select this checkbox to exclude system shares
-
Exclude hidden shares – Select this checkbox to exclude hidden shares
-
Specify action on Last Access Time (LAT) preservation as follows:
-
Action on failure to enable LAT Preservation – Before scanning each file, FSAA attempts to enable an operating system feature to preserve the LAT when accessing the file. This operation may fail for a variety of reasons, which include but aren't limited to: the operating system or file system where the file is located doesn't support LAT preservation, or insufficient permissions from the service account trying to access the file. The following configuration addresses a failure to enable the LAT preservation mode:
- Continue to scan file silently – FSAA scans the file with the possibility that LAT preservation isn't possible. No warning appears.
- Continue to scan file with warning – FSAA scans the file with the possibility that LAT will not be preserved. A warning appears for this file.
- Skip file silently – FSAA will not scan the file. No warning appears.
- Skip file with warning – FSAA will not scan the file. A warning appears indicating the file was skipped.
- Abort the scan – FSAA will abort the scan. No further files will be processed.
-
Action on changed LAT After scan – Before scanning each file, the LAT of the current file is recorded. After scanning, FSAA verifies whether the LAT has changed since then (likely scenarios are either that the LAT preservation mechanism failed to function as intended, or that the file was accessed by someone while the scan was occurring). The following configuration addresses a changed LAT:
- Continue scan silently – The scan will move on to the next file while updating the LAT for the processed file. No warning appears.
- Continue scan with warning – The scan will continue on to the next file. LAT will be updated for the processed file. A warning appears.
- Force-reset file LAT silently – The scan will reset the file's LAT to its original state before processing. No warning appears. The scan will proceed to the next file.
- Force-reset file LAT with warning – The scan will Reset the file's LAT to its original state before processing. A warning appears. The scan will proceed to the next file.
- Abort the scan – FSAA will abort the scan. LAT will be updated for the processed file. No other files will be processed
-
See the Scan Settings Tab topic for additional information.
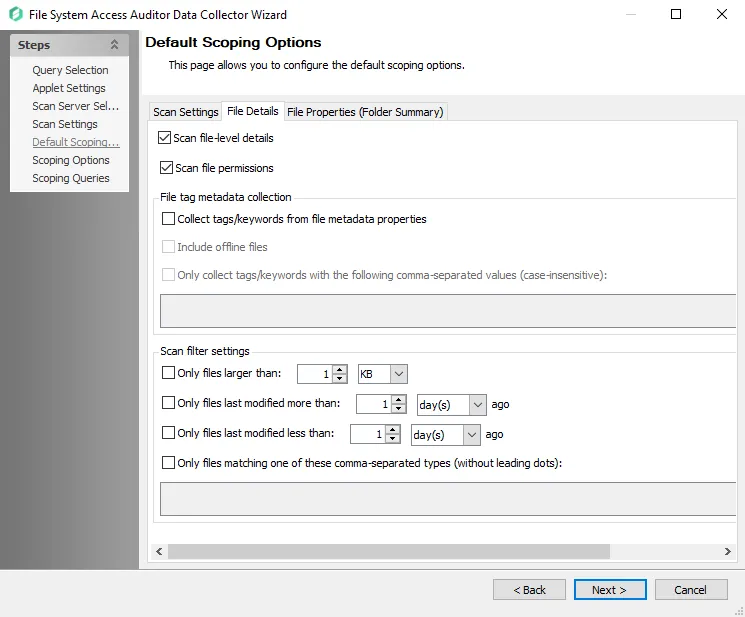
Step 9 – On the File Details tab of the Default Scoping Options page, you can enable file-level scans. See the File Details Tab
Carefully consider configuring the following settings. Applying filters after you enable file detail scanning reduces the impact on the database.
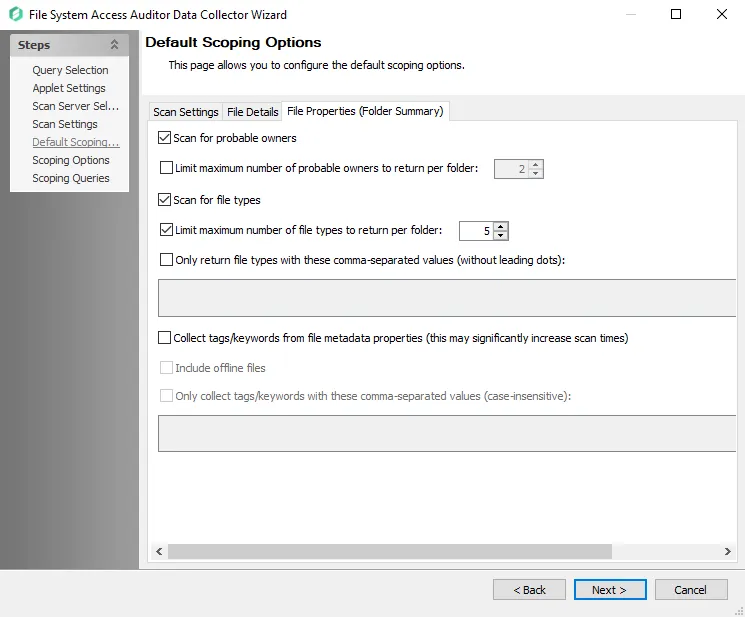
Step 10 – On the File Properties (Folder Summary) tab of the Default Scoping Options page, you can configure the following:
- Enable scan for probable owners
- Add a limit to the number of probable owners returned
- Scope file types to scan
- Add collection of tags and keyword
- Enable return of files with only comma-separated values (CSV files).
See the File Properties (Folder Summary) Tab topic for additional information.
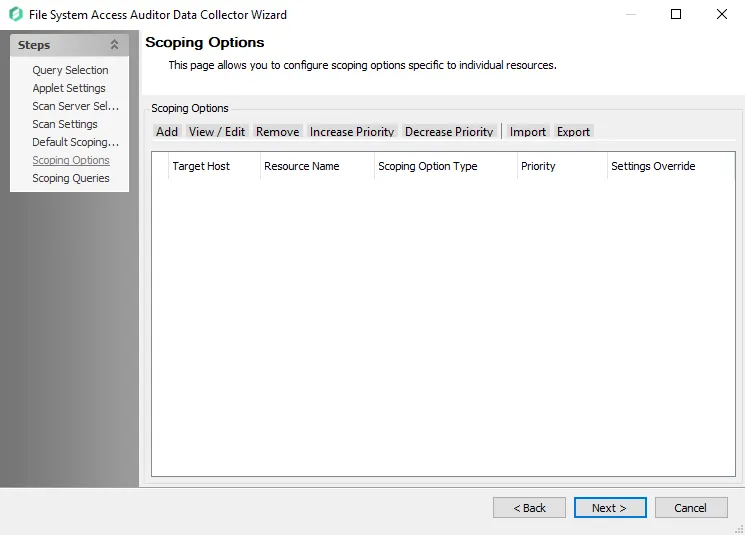
Step 11 – On the Scoping Options page, add share/folder inclusions and exclusions. See the FSAA: Scoping Options topic for additional information.
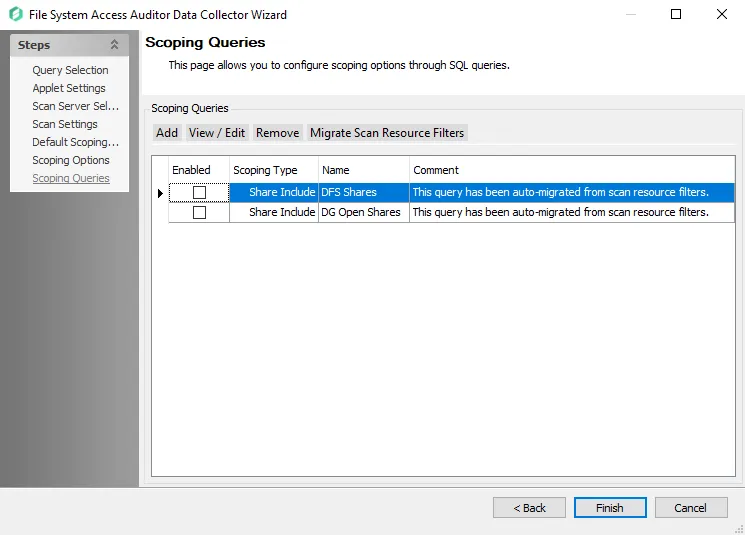
Step 12 – On the Scoping Queries page:
- Add folder/share inclusions
- Add folder/share exclusions
- Restrict scans to DFS shares or Open shares
See the FSAA: Scoping Queries topic for additional information.
Step 13 – Click Finish to save any setting modifications or click Cancel if you made no changes. Then click OK to close the Query Properties window.
If you made changes, the 1-FSAA System Scans job is now customized.
Analysis Task for the 1-FSAA System Scans Job
View the analysis task by navigating to the FileSystem > 0.Collection > 1-FSAA System Scans > Configure node and selecting Analysis.
Don't modify or deselect the selected analysis task. The analysis task is preconfigured for this job.
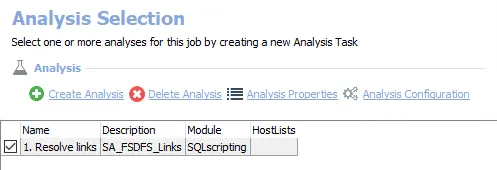
The following analysis task is selected by default:
- 1. Resolve links – Resolves DFS links in standard tables