Updating Netwrix Cloud Agent
With Netwrix 1Secure, you can update the agent by installing a new version or using the Self-update function. Self-update eliminates the need to install new versions manually by providing real-time notifications, agent schedule management, and a bulk update option.
Activity monitoring continues during the update process.
| Icon | Description |
|---|---|
 | Bell Icon. Click the Bell Icon to view available updates for the Netwrix Cloud Agent. |
Update Agents in Bulk
To update agents in bulk:
Step 1 – To update selected agents, on the Managed Organizations page, select Bulk Update Agent.
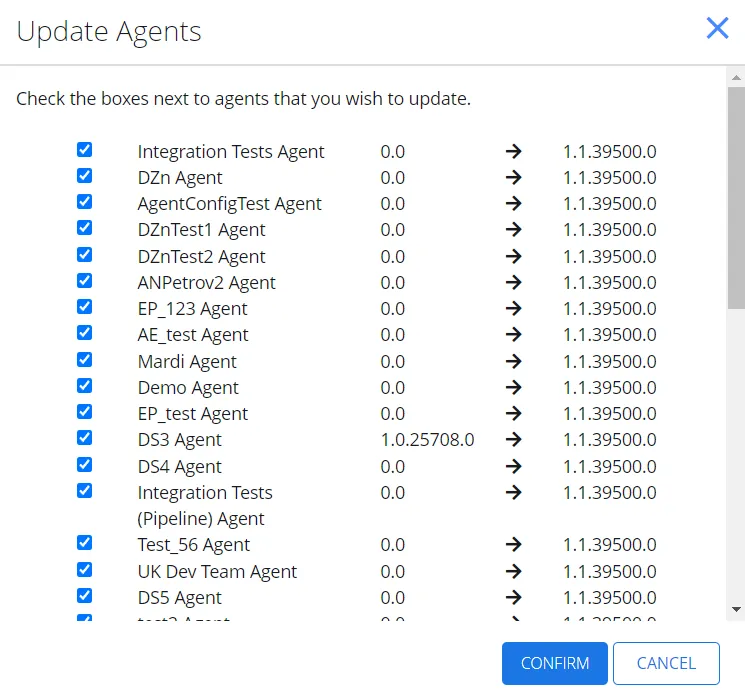
Step 2 – On the Update Agents page, check the boxes next to agents you want to update and click Confirm.
The agents are now updated.
Edit Agent Update Schedule
To edit the agent update schedule:
Step 1 – To edit the agent update schedule, on the Managed Organizations page, select Agent Update Settings. The Edit Agent Update Schedule page displays.
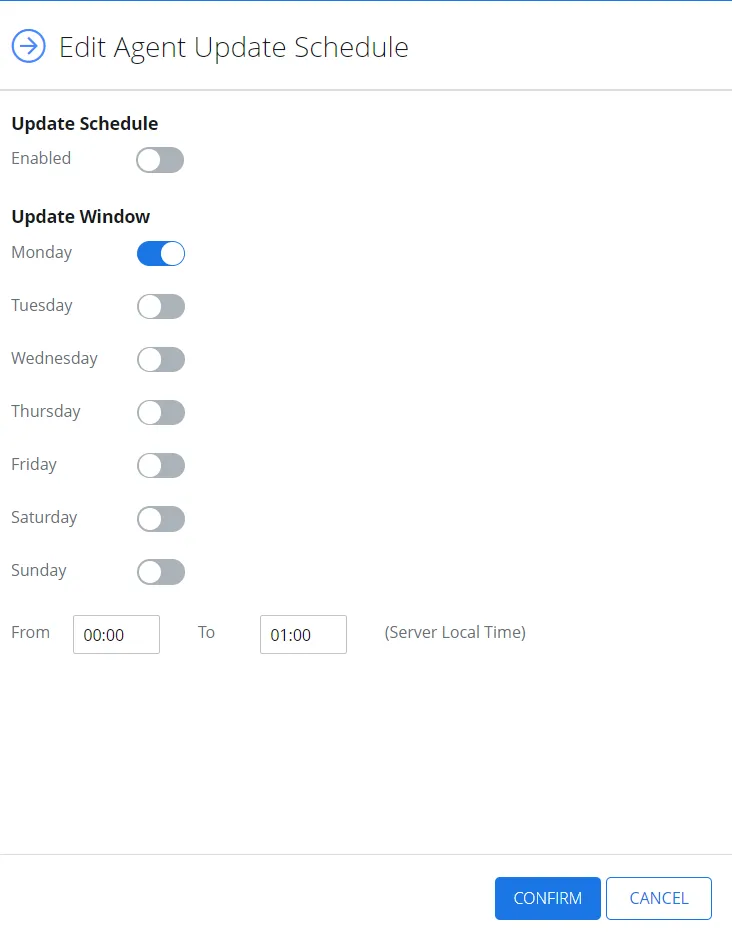
Step 2 – In the Update Schedule section, select Enabled.
Step 3 – In the Update Window section, configure the options to specify when you want the update to occur.
Step 4 – Select Confirm.
The agent update schedule is now configured.
Enable Self-Update Function
To enable the self-update function:
Step 1 – Click the Bell icon to view available updates. The panel with available updates displays.
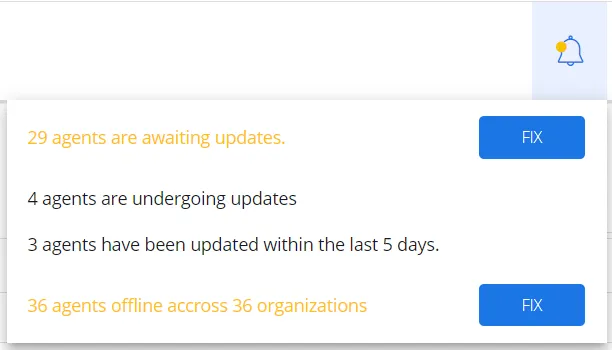
Step 2 – Click Fix for the agents to be updated. The list of organizations and agents available for update appears.
Step 3 – Click Update available to update the agent to the current version. The Edit Agent Update Schedule page displays, offering you the proposed version.

Step 4 – Select Confirm. The agent updates and uploads a new .msi file.
Step 5 – Alternately, update the version for an organization from the Managed organizations page. Select the organization and then the Sites tab.
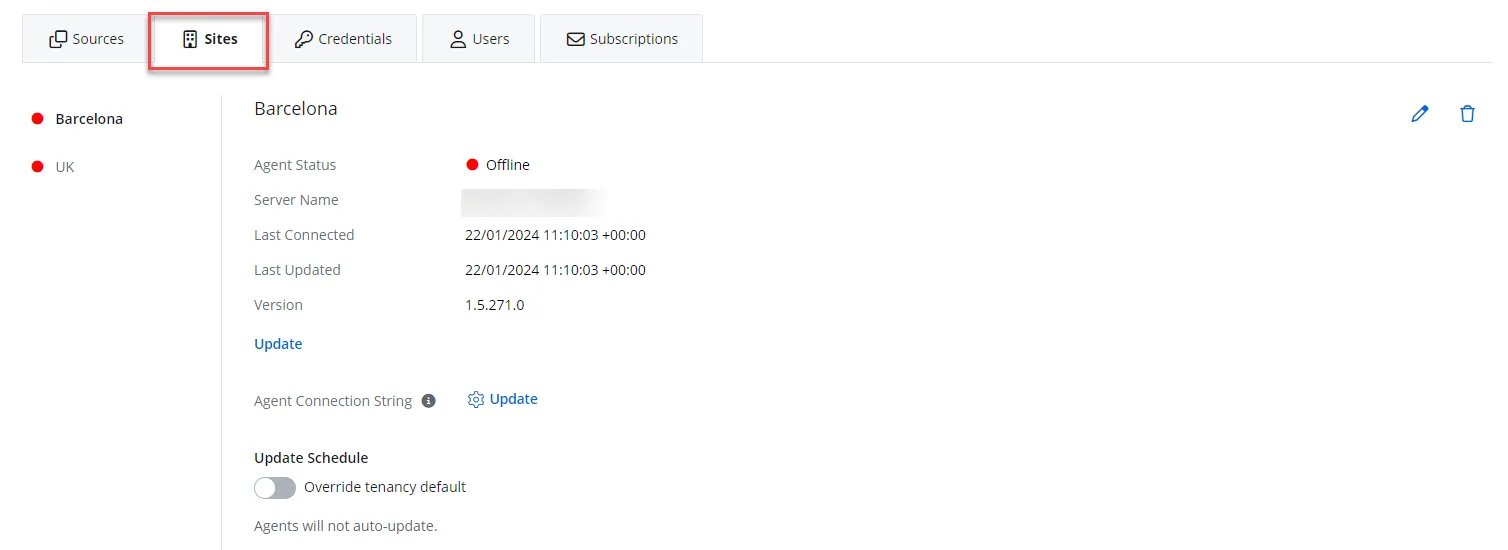
Step 6 – Click Update.
Step 7 – To change the update defaults for that organization, toggle on Override Tenancy Defaults.
Step 8 – Click Edit.
Step 9 – On the Edit Agent Update Schedule window, select Enabled and apply the required parameters to specify when you want the update occur.
Step 10 – Click Confirm.
The self-update function is now configured.