Custom Reports
You can define a filter set and create a custom report based on the filter so that you don't have to set it up next time.
Create a Custom Report
To create a custom report:
Step 1 – Click Reports in the top bar to navigate to the Reports page. By default, the page opens to the Activity tab with New Investigation selected in the left pane.
Step 2 – Select an organization from the dropdown menu at the top of the left pane to create a custom report for it. An organization is selected by default, but you can choose a different one if needed.
Step 3 – Define a filter criteria. See the Apply Filters topic for additional information.
Step 4 – Click Save as in the upper right corner of the page. The Create Report pane is displayed.
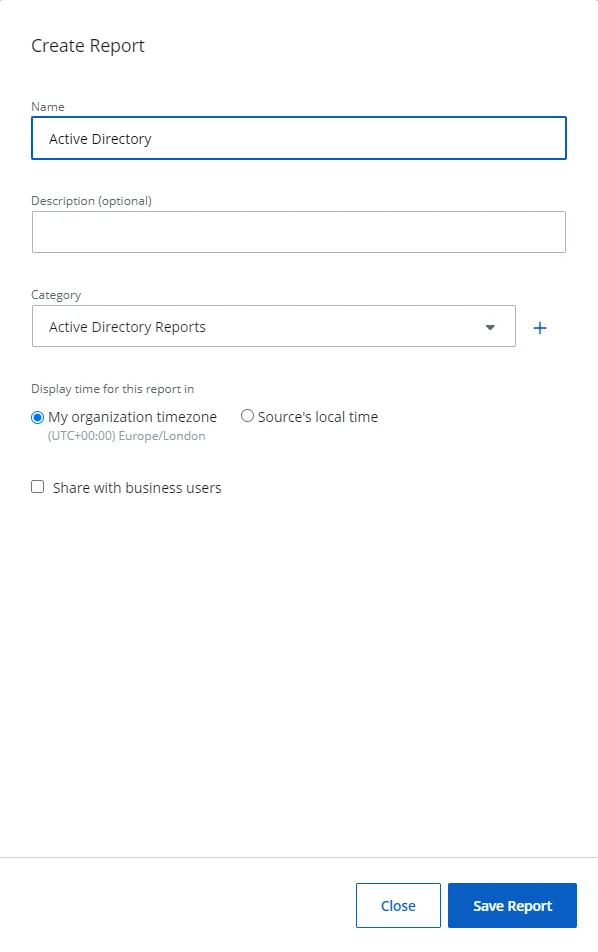
Step 5 – In the Create Report pane, specify a name and description for the report in the Name and Description fields.
Step 6 – From the Category dropdown menu, select an existing category or add a new one for the report. The category is used to group related reports together. To add a new category, click the Add icon, specify a name, and click the Save icon. The new category is added.
Step 7 – For Display time for this report in, select an option to display the time the report is generated.
- My Organization timezone – The timezone set for your organization
- Source's local time – Local time for your source obtained from the agent server. (Recommended when applying the Time of Day filter)
Step 8 – Optionally, select the Share with business users checkbox to share the report with business users. See the Add the Business Viewer Role topic for additional information on shared reports.
This checkbox isn't available for End Customer Organizations.
Step 9 – Click Save Report.
Your custom report is created under the respective category.
You can link this report to an alert. See the Add a Custom Alert topic for additional information.
Modify a Custom Report
To modify a custom report:
Step 1 – Click Reports in the top bar to navigate to the Reports page. By default, the page opens to the Activity tab with New Investigation selected in the left pane.
Step 2 – Select an organization from the dropdown menu at the top of the left pane to access its reports. An organization is selected by default, but you can choose a different one if needed.
Step 3 – In the left pane, click a category to view its reports.
Step 4 – Click a custom report to open it. Predefined reports and custom reports are represented by different icons, enabling you to distinguish between them.
Step 5 – Click Edit to modify the report. The Edit Report pane opens.
Step 6 – Modify the required information. See Step 5 through 8 in the Create a Custom Report topic for additional information.
Step 7 – Click Save Report.
Delete a Custom Report
To delete a custom report:
Step 1 – Click Reports in the top bar to navigate to the Reports page. By default, the page opens to the Activity tab with New Investigation selected in the left pane.
Step 2 – Select an organization from the dropdown menu at the top of the left pane to access its reports. An organization is selected by default, but you can choose a different one if needed.
Step 3 – In the left pane, click a category to view its reports.
Step 4 – Click a custom report to open it. Predefined reports and custom reports are represented by different icons, enabling you to distinguish between them.
Step 5 – Click Delete. A confirmation dialog box appears. Click Delete.
The custom report is deleted from the system.