Add a Source and Connectors for Computer
To add a Computer data source and connectors to your organization:
Step 1 – Click Configuration in the top bar. The Managed organizations page is displayed, that lists the managed organizations defined in 1Secure.
Step 2 – Click an organization to define a data source and connectors for it. The properties page for the organization is displayed with the Sources tab selected by default.
Step 3 – On the Sources tab, click Add to add a source. The Select Data Source (Step 1 of 3) pane is displayed.
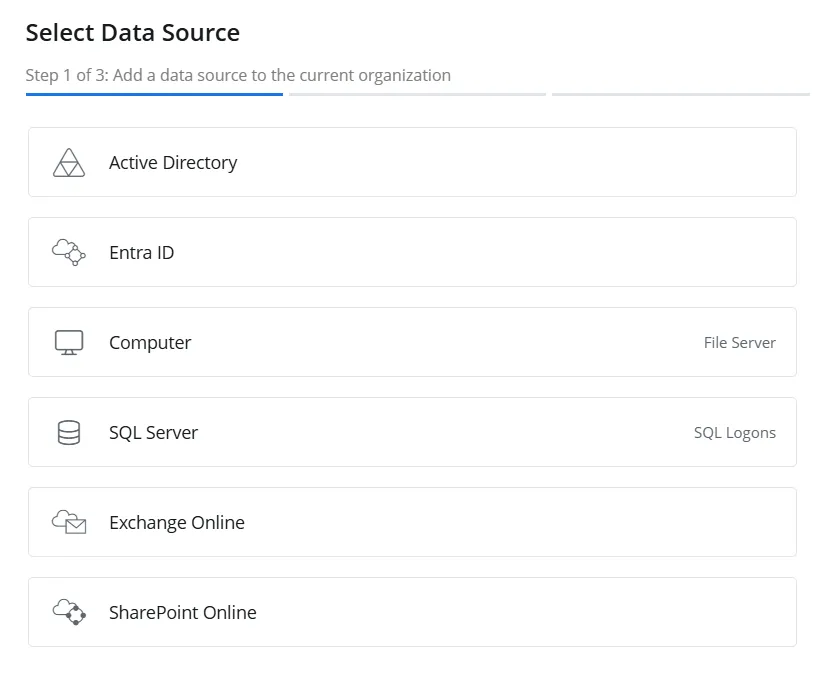
Step 4 – Select Computer and click Next.
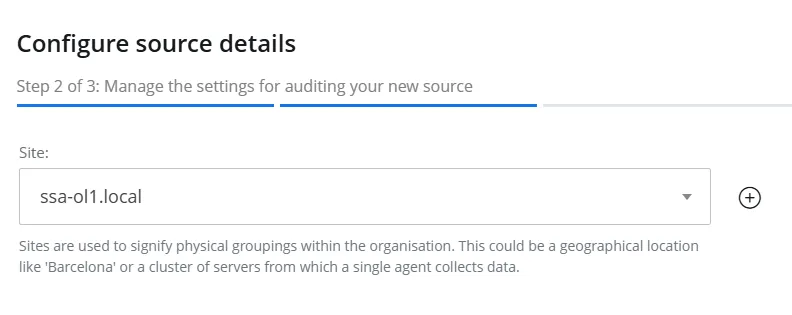
Step 5 – On the Configure source details (Step 2 of 3) pane, use the Site dropdown menu to select an existing site or add a new one. To add a new site, select the Add new site option from the dropdown menu or click the Add icon.
-
When you choose to add a new site, you have to provide a name for it in the New site name field. Then click Next to proceed with configuring the agent for the site. See the Install Agent topic for details on configuring the agent, starting at Step 6.
-
When you select an existing site from the dropdown menu, one of the following happens:
- If the agent has not been configured for the site, the system proceeds with the agent configuration when you click Next. See the Install Agent topic for details on configuring the agent, starting at Step 6.
- If the agent has already been configured for the site, the system proceeds with the Computer source and connector settings when you click Next.
Step 6 – Click Next.
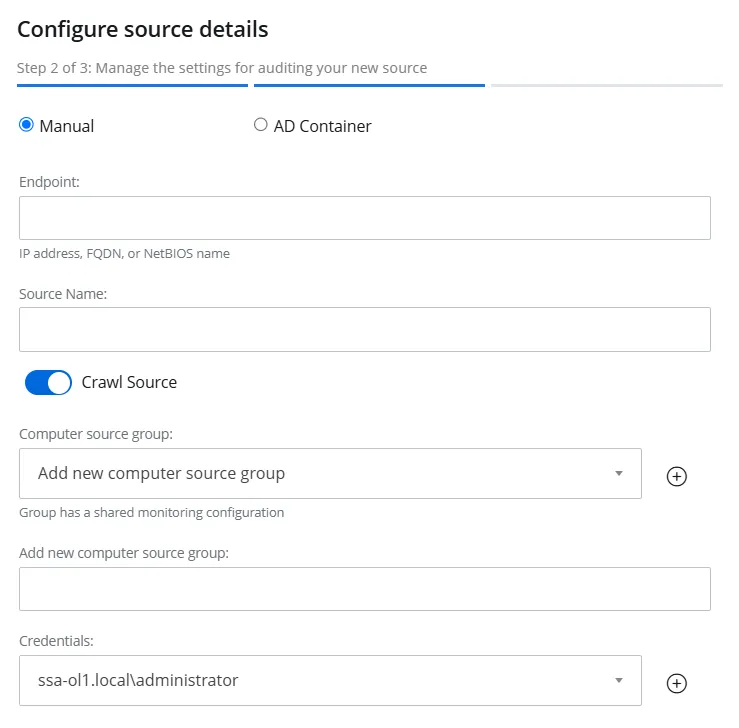
Step 7 – Select the Manual or AD Container option button.
-
Manual – Select this option to crawl a single computer or all computers within a domain. Specify the following:
- Endpoint – Specify the IP address, fully qualified domain name (FQDN), or NetBIOS name of the computer to crawl. If you specify a FQDN, 1Secure crawls all computers within that domain.
- Source Name – Specify a name for the data source
- Computer source group – Displays the computer source groups that have already been added, while also providing the option to add a new source group. Grouping sources, such as computers, allows them to share a common configuration and makes it easier to manage related sources together. Select an existing source group or add a new one. To add a new source group, select Add new computer source group from the dropdown menu or click the Add icon, then specify a name for the source group in the Add new computer source group field.
-
AD Container – Select this option to crawl the computers within an Active Directory container, then specify:
- Domain Name – Specify the FQDN of the domain the container exists in.
- Container Name – Specify the name of the container to crawl its computers.
- Detection Interval – Specify the time interval (in hours and minutes) after which the source group will automatically detect the computers for auditing.
- Source Group – Specify a name for the group to which the data source will belong. Grouping sources, such as computers, allows them to share a common configuration and makes it easier to manage related sources together.
-
Crawl Source – Toggle this option to ON to enable data collection for the source
-
Credentials – Displays the crdentials that have already been added, while also providing the option to add new credentials. Netwrix 1Secure uses these credentials to connect to the data source. You can select existing credentials or add new ones. To add new credentials, select Add new Credentials from the dropdown menu or click the Add icon, then specify the following:
- Username – The name of a user account with the access rights to collect data from a computer or all computers in a domain. Provide the username in the Domain\UserAccount format.
- Password – The password of the user account
- Display Name – Specify a name to display for your credentials. The name appears on the Credentials tab of the Managed Organizations page.
Step 8 – Click Next.
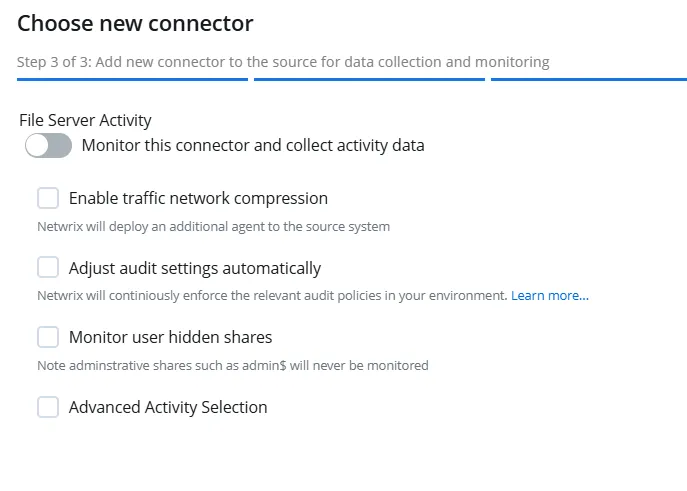
Step 9 – The Choose new connector pane (Step 3 of 3) lists one connector for computer. Specify the following:
-
File Server Activity – Toggle the File Server Activity switch to ON to collect and monitor data for this connector. With this, you can generate activity reports on File Server data. See the File Server topic for additional information.
-
Enable traffic network compression – Select this checkbox to enable traffic network compression for the connector. See the Network Traffic Compression topic for additional information.
warningIf Netwrix Auditor and Netwrix 1Secure audit the same domain, ensure that the network traffic compression service is enabled for only one of the products or neither product for any of the audited services. It can't be enabled for both products.
-
Adjust audit settings automatically – Select this checkbox to adjust the audit settings automatically. With this approach, 1Secure checks your current audit settings at each data collection session and adjusts them if necessary. See the Active Directory: automatic configuration topic for additional information.
-
Monitor User Hidden Shares – Select this checkbox to monitor the user hidden shares on the computer.
noteAdministrative hidden shares such as admin$ aren't monitored.
-
Advanced Activity Selection – Select this checkbox to choose the successful and failed actions to audit on the computer.

Step 10 – Click Finish.
The Computer data source and connector have been configured.